Organize: Part 2 – A way of Thinking
Fellow photography enthusiast, Neil Creek, continues his series on the topic of Organization in Photography. For more of Neil's work, be sure to visit his photography blog and subscribe to his feed.
After last week's introduction, it's time to get into the nitty gritty of organizing your images. Like most really important things, being organized isn't just a method, it's a way of thinking.
Everything you do with your images benefits from a structured way of thinking, and it works best when it happens seemlessly and naturally. For new photographers, remembering to have enough memory cards, and knowing where you copied your photos can be a challenge. For an organized photographer it's rarely an issue because the way they do things doesn't allow for such mistakes. If you make a habit of organized thinking, then organization becomes as natural as breathing.
FOLLOW THIS SERIES OF ARTICLES!
BACK — GETTING TO GRIPS WITH IMAGE MANAGEMENT
NEXT — SEEING IT THROUGH
That's all very philosophical and entirely useless without specific examples, so I'm going to walk you through my workflow and hopefully you'll be able to see from that example what I mean. I should let you know that I'm not an expert and my system is not perfect. Organized habits are hard to form, and what works for me may not work for you. Have a look at the way I do things, and see if you can adapt it to your own style.
Example – My workflow
Below are the typical steps in my workflow. Where there needs to be a further explanation, I've linked to further down in this post. Due to the detail I go into to cover these points, I'll be discussing the second half of my workflow in the next post in the series.
 |
Take the shot | Click! |
 |
The card fills up | If I'm shooting in the field I copy the card to my portable storage device. |
 |
Once at home | Create a new directory on my RAW hard disk drive and copy all files there from the card/portable HDD. |
 |
In the new directory | Copy all the files from the auto-generated sub-directories into the new top level directory and rename them all. |
 |
Load up Lightroom | Import all the files (into whatever RAW processing/image editing software you prefer), applying what metadata you can on the way. |
 |
Process | Delete the duds, flag the picks and process. |
 |
Additional metadata | Assign more detailed and descriptive metadata to the picks of the shoot. This is where I need to make the most improvements to my routine. |
 |
Preparing for output | On my DERIV HDD, I prepare a new directory. |
 |
Export | Using my preferred settings for the intended use, I export all the photos I want. |
 |
Share | Upload, email, burn or otherwise disseminate the images. |
 |
Backup | Automated software mirrors all changes of my entire RAW and DERIV HDDs every night for a current backup. I still need to implement an off-site backup but this would be a relatively simple additional step. |
 |
Retreival | With the directory and file naming schemes I use, finding the images I'm looking for is usually very simple. Because my metadata routine is imperfect, finding images based on concepts is a little tougher. |
Sections in grey will be covered in Part 3.
Hardware setup
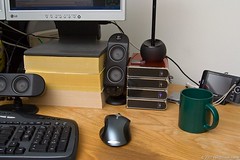
After having a hard disk drive (HDD) die, taking with it five years of photos (which I fortunately managed to retrieve years later), I swore that I would never be without backup. My current HDD setup is largely inspired by by Peter Krogh.
I have a series (currently 4) of 320Gb USB2.0 external HDDs. They are grouped into pairs, a primary and its mirror. One pair stores my RAW files, and the other stores derivative files and all my non photography data. The idea is that when the RAW disk fills, I buy another pair. Currently however, the “RAW2” disk is a subdirectory on the “DERIV1” drive untill I can afford another pair. Theoretically the DERIV disks will take a lot longer to fill than the RAW drives.
Directory naming format
A consistent naming system is absolutely critical to any digital asset management, especially photos. Names generated by your camera contain no information about the photo, and they are not unique. Your file name could be the same as hundreds around the world, or worse, when you “go round the clock” and take enough photos to cause the camera to start re-using numbers, you could overwrite your old files.
I use a similar system for naming my directories and photos. A typical directory on my RAW HDD might look like this:
Date – Description
The date is very useful. In the space of just six characters I can uniquely identify any date within one hundred years. The date is read in pairs from left to right in descending order of detail. Year, month, day. The reasons for choosing this format are:
- Only six characters is very efficient, it takes up as little room as possible, making it easier to scan a list of folders in a narrow column in your file manager.
- The decending order starts with useful information and gets increasingly more useful. If you start with the day, it could refer to any of a hundred years. By starting with the “big” time block you can easily and quickly narrow down to the exact day.
- An added bonus to this method means that files are sorted correctly by date in your file manager.
- The confusion between European and Amrican date formats is avoided.
The description is simply to help me find the folder once I’ve narrowed down to the approximate date. If I know I took those milk and dye photos in January sometime, a quick scan down the directory list will find them. If the description includes relevant keywords, it’s possible to search for them with your file manager’s “find” tool. If I shoot more than one subject in a day, I just keep adding to the description, though I try and keep it under ten or so words, usually it’s only two to four.
File naming format
Once I get all my photos into the day's directory, I rename all the photos. Whatever naming convention you decide to use for your photos, the most important thing is that you STICK with it. The strength of a naming system is that it is consistent. If you use more than one system, things will quickly become a jumble, and you won’t be able to confidently track your photos.
The file naming system I use for my photos is similar to the one I use for my directories. A typical RAW file might be named like this:
My name – Date – Unique number . Extension
In the last couple of years I've started using my name as a prefix to my photo names for a number of reasons:
- The photo is easily identified as one of mine. I’m helped by the fact that my surname is uncommon. This is valuable if my photos are being passed around a client’s studio. They don’t have to delve into the image’s metadata to know who took the photo. It also helps me build my name as a brand.
- Having a word, especially a name, in front of the otherwise purely numerical filename draws attention to the file. A file with a numerical name looks machine-generated and can easily be ignored, or mistaken for some other kind of file. A name draws attention to the file and gives it some protection from deletion.
- Sometimes I shoot with friends, and keep an archive of their photos with mine. The naming system works equally well for their photos, but a name prefix keeps our photos seperate.
- Being a short name it doesn’t add too much to the length of the filename, and since all my photos have the same prefix, it doesn’t affect their sort order.
The rest of the file name is pretty straightforward. The date is used in the same way and for the same reason as in the directory name. The unique number is just a count, from 001 up. For especially large shoots, you could count from 0001 and up. The extension is the default RAW file type, but that will change soon enough, as I will discuss in a later point.
It’s important to note – name your photos before you do any culling. Once you’ve named your photos don’t rename them EVER, otherwise it will lead to a version control nightmare! There's nothing wrong with having a file list with missing numbers.
To rename my photos I use a great piece of Aussie software called Directory Opus as my file manager, and it includes a batch rename tool. I'll talk more about the tools I use to assist my photo organization in a later post in this series.
Metadata on import
Metadata is an incredibly useful tool, and has been discussed in detail in many articles online, but for now a simple definition of metadata is “data about data”. This is where all the information about your photo is stored.
Photographers should also be interested in the IPTC metadata fields. Of most interest is the credit information and keywords.
Credit information is crucial for identifying a photo as the work of a particular photographer. It allows others, especially potential users of the photo, to know who took the photo. I've created a metadata preset in Lightroom that adds all my details to every photo I import.
Keywords are extremely useful for describing a photo, and later finding it. Search engines are not yet smart enough to recognize the content and context of a photo, so keywords fill the gap. Effective keyword use makes searching a huge database of images for exactly the one you want straightforward. The main problem with keywords is that it’s a lot of work to keyword hundreds or thousands of photos. Inconsistent keyword use also lessens their usefulness.
At this stage in my workflow I assign a standard credit to all imported photos, and I add a few keywords that apply to all images in the shoot. Sometimes this isn’t very easy as a shoot can be varied, but even one or two keywords can help make it easier to find, say, family photos among a year’s worth of professional and other kinds of photos.
Detailed metadata

This is where the keywording task becomes daunting. Adding additional keywords to individual photos is time-consuming, tiring and not fun at all. However, the payoff can be huge. Searching for a specific image from thousands of keyworded ones is so much easier and the time spent keywording can be saved in searches many times over.
This is the biggest weak point for me in my process. I rarely spend the time keywording that I should, and as a result I have to rely on my file naming system to find photos. However, if I am ever offering photos for sale, I’ll dedicate a great deal of time and effort to keywording those photos. This helps them be found by potential customers, and adds considerable value to the image for them.
There are many tools and tutorials to assist with keywording, and I’ll refer to some of those in a later post in this series.
Looking forward
Next week, we'll look at the remainder of my workflow in detail. Last week we had a few good comments about how folks organize their own photo workflow. I'll be collecting and organizing the best advice for the final part of this series, so if you have some suggestions or stories of your own experience, please post them in the comments! Perhaps after reading about my workflow so far, you'll have some suggestions for improvements I could make, or maybe you can share how you've adapted some of my method into your own style. If you have any valuable resources, such as links, software or books, let us know about them! I hope to hear from you.
Look forward to next week, but don't wait till then to start organizing yourself! Remember, good organization is a way of thinking, and there's no better time to start than now.
FOLLOW THIS SERIES OF ARTICLES!
BACK — GETTING TO GRIPS WITH IMAGE MANAGEMENT
NEXT — SEEING IT THROUGH
RM
January 16, 2008Great post. I adopted the ‘backwards date’ naming system last year sometime and have never looked back! Its SO quick to recollect anything!
Thanks for all the other info as well.
Antoine Khater
January 16, 2008Great job Neil !! I love the series . Of course each of us has his/her own workflow but it is interesting to compare what you are doing to others
philippe lenain
January 16, 2008great job, very interesting… I’m not a pro-photographer, just a beginner, and I use the same kind of tips. I name the directories “date place subject”, I find useful to see the place of shooting, when you often move from a place to another. and I still have to work on the metadata… but using the canon software, I find troubles to export them. last but not least, I had the same problem that you had, losing all data from a HDD… by now, I have a usb external HDD for “current” saving, another one for a monthly backup, and copies on DVD…
thanks for sharing your process!
My Camera World
January 16, 2008Well done article Neil
Since this article has to with organization I will describe my approach to my workflow with organization of images.
First and foremost the organizational structure I use is directly tied to how I remember. The vast majority of my shooting is pre-planned and either event or location driven and I can remember almost all the details of the shoots and there have been many over the years.
Therefore I download the photos from a shoot into a unique folder with the name of the event such as:
Antique Cars Byward Market
Reverse 50mm lens Tabletop Flowers
I use Adobe Bridge as my photo management tool and when I open this folder I always perform these functions.
Rate each image (0-5)
Provide meta tags such as Location, season, event, unique characteristics (river, flowers, trees, skies, street, etc).
For every image I work on I create a unique folder that contains the Photoshop files (master and one for each print size, as well a jpeg version for each web or projector versions).
Each file will in the long descriptive name also include the Camera Raw name (DSC_xxxxx). This permits me to search for the original files easily, in case I am not able to remember the event from the image.
Photoshop also allows you to colour code (5) each file and I do this for each worked on images (worked-on, printed, entered competition, and 2 reserved for future use.
I use the same process for scanned negatives from either the medium or large format cameras.
I have a RAID array for the internal drives and 2TB external storage. All worked is backed up to dual backup external storage. Every file that is rated 2 or less is removed from Local drive.
Some of the Photoshop files can be over 1GB and every Photoshop files over 350MB is removed from local storage and a jpeg file that says (BACKED-UP) is placed in the folder with the same name and the Photoshop files (‘b’ added at end). That way I know there was a Photoshop file created and which I can go and get from external storage.
As Neil states and I agree with, it is important to think ‘How will you handle 10,000 files or more’ because after enough time you will have that many.
Having a strategy now makes sure that in the future you will be able to use the same organizational system as you expand.
Niels Henriksen
Deborah
January 16, 2008Neil,
Thanks for this series. Two years ago in my photography class, the method for managing/organizing was focused on Bridge. With Lightroom’s release last year, I know many people have moved from using Bridge to Lightroom. Will you be highlighting the advantages/disadvantages of using Bridge/Lightroom? I have both, but frankly have not explored using Lightroom.
Zack DeLaune
January 16, 2008Thanks so much for this series! This is something I’ve been struggling with, because I’ve been learning and advancing so much in the past 2 years, switching to RAW, stumbling upon new software, etc. So my work is a jumbled mess. I’m particularly interested in the backup and external HDDs you use. Can you (or anyone) recommend a good brand and where to get good prices? I look forward to the posts on keywording also.
My Camera World
January 16, 2008I do recommend that you buy the newer SATA drives and these are easier to re-use in a PC these days.
Whenever you have highly fast spinning mechanical items with delicates magnetic media, then there is always a chance of failure.
I do not think within the consumer market that there is much difference form drive manufactures and in some cases they may be even buying form the same source or next year re-sourcing with a new supplier.
I recommend that for the better images that there is at least 3 levels of back-up and one being of site, in case of fire, flood etc.
For the regular remainder of images I recommend 2 levels.
Remember that in a lightning strike if all drives are connected (and I always have one of my back-ups not physically connected) that they will all fry together.
Drives are now very cheap. Buy many and but the often. I even have some drives in my safety deposit box.
I use RoboCopy and the GUI interface add-on to manage my back-ups (both free).
Niels Henriksen
Daniel
January 16, 2008Neil,
Great article. I almost use the exact same work flow, except my naming structure is [shoot/project][date] because in my mind I’m more likely to remember the shoots or projects I take rather than when I took them. It also avoids the issue of having multiple shoots in one day. In the end, it’s all a matter of what works for each photog.
Also, for part 3, if you’ve tried different backup software in your own quest to get organized, can you briefly mention which ones and your thoughts on them?
Tyler
January 16, 2008Very nice article. What I’d like to find is a good version control system for my photos to help me keep track of everything while allowing me to change files, but not lose their history. Anyone have any suggestions?
Sara Collaton
January 17, 2008My Workflow:
– Take pictures and load into computer
– I name my folder containing the pictures with the date then what the event was
example: 2008-01-17 – Photo walk Toronto
– Inside that folder are three more folders.
– Original (containing the original RAW files)
– Edit (where I keep my processed images, saved to JPGs at full size. Sometimes I’ll keep .psd files if it’s a new editing technique that I want to reference again)
– Web (taking the image from the ‘Edit’ folder and with a photoshop action, resizing for the web and adding a border).
The benefit to this (for me anyways) is that I have a full size edit ready if/when I want to produce prints and I don’t have to go back and worry about the steps I did to get to the web version.
I shoot or have shot for local bands, do my own modeling for photographers and am a makeup artist. In order to quickly find those shots, I have seperated them from my own ‘regular’ photography. Here is how I organize my photos on my computer:
– Photography
– _Raw Photos (All of my work gets moved here)
– _Unsorted Photos (is only used as a temporary location if/when I have multiple photography sessions that I’ve loaded onto my computer at once, or something recent I haven’t gotten around to editing)
– Concerts
– Makeup
– Modeling
I added the underscore to Raw and Unsorted just so they’d always be at the top of the structure. Inside these folders, I break it down to folders by year, then my event folder (2008-01-17 – Photo walk Toronto) which then of course, has my Edit, Original and Web folders inside.
I have started practicing tagging and rating my photos within Adobe Bridge and will, over the next month adopt a consistent batch renaming technique for the files before I start saving different versions of them. For now, I keep the original name from the computer and add an _Edit.jpg or _Web.jpg depending on which folder it’s in. I do like the idea of having the date in my file name though.
Deborah
January 17, 2008Brian,
Will Neil be responding to the specific questions/issues for each part of the series? Or will he address issues we raise in comments in subsequent articles?
Brian Auer
January 17, 2008I’m not sure — maybe a bit of both. I’ll see what he has in mind…
Cooper Drury
January 17, 2008A couple of thoughts about workflow and backups.
After taking the pictures, I put them in a monthly folder named, for example, 2008 01 January. The name lets me sort and easily see what the dates are (no need to translate in my head that 09 is September, for example).
Next, I apply metadata and backup (see below).
I don’t rename the photos, but if edit them I save as a different file type and add _e (for edited) to the file name. If I make extensive edits, then I keep the psd file as well. Ultimately, I can end up with as much as 4 files for a photo, for example: _dsc0001.nef, _dsc0001.xmp, _dsc0001_e.psd, _dsc0001_e.jpg. My psd files have never gotten over 100m. I suppose if the do, I’ll rethink keeping them.
For backup, I use a simple utility to synchronize to a file server I have running in my garage. That may sound expensive, but anyone can simply use an old PC, but a new hard drive in it, and share the drive. The advantage is that it can be very cheep and them accessable from any computer in the house. I do most of my work on my laptop (it’s faster than my PC), but once I have synchronized everything, I have three copies of my photos (server, desktop, laptop). I also keep a external drive at work that I sync to, so there is an off-site back up.
Finally, I burn CDs each month. That way, I have a non-magnetic backup of the files.
I don’t add specific names to the directories because that’s what the metadata do–just add basic keywords and use Bridge to search them. I like not having a bunch of different directories because it lets me backup by month without any question of what needs backing up.
While I can imagine that a pro would need the specific directory names, I don’t (even though I take plenty of photos). I would be interested in anyone’s thoughts on my workflow or backup system.
One parting thought, my backup system is VERY redundent because I believe there are two kinds of data: those that are backed up, and those that aren’t lost YET.
Sara Collaton
January 17, 2008back up:
I keep a synched back up of my full photography directory on a second external hard drive and every couple of months (depending on how much work I’ve done) I’ll burn a new dvd to back up once again.
Neil Creek
January 17, 2008Fantastic contributions everyone. It’s very enlightening to see the different ways that everyone has to keep their work organised. The thing that I think surprises me most is that even though there are many very different ways of doing the specifics, the basic fundamentals are pretty consistent to everyone. I’ll definately expand on this concept in Part 4.
Deborah – It was initially my intent that comments I received would go into the writing of the parts of this series as I made them, but I think that with the ongoing input from readers it would be best to save addressing them to the final part. I won’t be able to answer or address every comment, but I’ll try to cover the broad issues raised. As I said, I’m not an expert, so I’d be reluctant to answer specific questions (eg bridge vs lightroom), but I am hoping that the resources that I link to will be useful, and the conclusions I can draw from everyone’s comments will help answer the broader issues at least.
I’m certain that Brian will be able to find much fodder for future Epic Edits articles in the questions here, as am I for my blog 😉 I’m sure that this won’t be the last time I work with Brian on Epic Edits either!
Chris
January 18, 2008Thanks Neil; having problems with arthritis my workflow depends on how I feel at the time. Generally pictures are kept in a monthly archive which I dip in and out of.
Deborah
January 18, 2008Neil,
Thanks for the response. I look forward to your responses in the final article.
I hope someone will address the Bridge vs. Lightroom issue; perhaps something for another article Brian? I’m curious since my photo instructor said Lightroom was wonderful to use, but I’m wondering about the value, features, and of course, the time I would need to invest in learning yet another application.
CyberCarsten
January 18, 2008Thanks for putting all this together!
Brian Auer
January 18, 2008@Tyler – For version control, Adobe Bridge has the capability of interfacing with Adobe’s Version Cue for document control. It’s included in certain CS3 packages.
Brian Auer
January 18, 2008Neil, I just turned a new leaf in Image Organization thanks to you. I’m officially shooting nothing but RAW, managing my folder names and file names better (as you’ve shown above), applying a first coat of metadata on import, and processing the RAW files with Bridge and ACR to get my set of JPEGs for quick viewing. Now I just need to start going back through the archives and getting everything in sync.
I’m really not sure what all the hubbub is about with Lightroom. Doesn’t it basically do the same thing as Bridge+ACR? Maybe the controls are just a bit easier to use, or the layout is nicer? I’m interested in trying it out, but I probably wouldn’t buy it since I can do all of these things with the software I already have.
Deborah
January 20, 2008Brian,
Looks like you and I have the same opinion about Lightroom. If Bridge +ACR can do the same thing as Lightroom, why go to the trouble of purchasing and learning yet another application? Here’s one inquiring mind that wants to know!
Neil Creek
January 21, 2008I think the thing that sold me on lightroom was the very impressive video tutorials you can find in several places online. Sure you can achieve the same results, but the tools used for doing the work in lightroom are so intuitive, powerful and flexible that, in my opinion, it leaves Bridge+ACR behind. I have to be honest and admit that I’ve not spent a great deal of time using Bridge+ACR, and I’m sure if it had been my workflow for the last few years with which I had become comfortable, then I would have the same opinion as yourselves.
Bottom line, if it works for you and you’re happy, then keep doing it. But keep an open mind for better ways of working. At the very least, go check out those videos 🙂
TrudyKAS
January 21, 2008Great site, Neil! I am still tweaking my own image management system. My situation involves color and BW photos going way back to film days of 35 mm rangefinder technology, slides, negative and prints beginning in 1952, older prints and very few negatives in 120 black and white formats, and archived family prints taken way back prior to 1920. Digiscans recorded on 5 1/4 and 2 1/2 inch floppys, tapes, jazz drives, zip drives, and some video in 16 mm film and video tape. Non digital images, approximately 6500, all needing high quality scans and storage. Then there’s the easy part. Modern raw digital files with blessed metadata. So far I am using a variets of 250g to 1T external hard drives, and cds. Haven’t had much luck with dependability in burning dvds. Some of the older CD’s, good when recorded, are no longer reliable.
My problems include, not enough time for historical archiving, holding on to old obsolete equipment for access to read media, some media is not all that archival, in spite of manufacturers’ hype.
It remains to be seen how good, albeit how well organized our best available digital management will turn out to be over time. Digital photography per image may be inexpensive to record, but storage is and will most likely be an every increasingly expensive proposition.
TrudyKAS
January 21, 2008I have been using Adobe CS3 for over a year for a variety of digital applications. Since photography is my first love, most of my work has been in Photoshop since Version 4. When I started using Bridge and Camera Raw in CS2 several years ago, I thought that the similarities between them and Lightroom did not warrant purchase of Lightroom. But, continued perusal of current info from leading websites soon made that purchase critical for two distinct reasons. Primarily, because it is a database system, it saves on storage requirement for versioning particular files. The virtual image feature, keeps all necessary metadata in the Lightroom database for different versions of a raw image, e.g. black and white, color, duotone can be stored as virtual files with one raw file with very little additional memory use. (The metadata sets up virtual files, avoiding unnecessary duplication of entire image files. Secondly, the library can be maintained on the primary computer with access to enough information on all individual Lightroom files, regardless of where they are stored.(I have a total of 8 extermal drives and hundreds of CD’s, for example. I can get access to thumbnails of each file that I own on my system, provided they have been imported into Lightroom, even when the external hard drives or other storage media are not connected. This keeps track of the entire collection in one place.) Lightroom has additional bells and whistles for photographers, that no other program offers. And it plays well with the entire Adobe line of software. It does not substitute for Photshop, but I find it a necessary and time saving part of my postprocessing.
Deborah
January 22, 2008Trudy,
Thanks for the info about Lightroom. Any chance you might go into more depth with a Lightroom vs. Bridge discussion? I would love to learn more about it, from someone who has used both, and made the decision to use Lightroom for photo management. Brian – any possibility Trudy could do a guest article?
Brian Auer
January 22, 2008That’s always a possibility — I’m certainly interested in seeing a detailed comparison of features between the two pieces of software.
TrudyKAS
January 22, 2008Deborah and Brian
Thanks for your suggestion, but it’s best to keep this blog on the subject of digital asset management, don”t you think?
My mind is like a sponge, I absorb a lot, but lose the information all too fast, as well. This kind of forum is so stimulating for me, to expand my interests, as well as to pick up some practical info.
The concepts that I have mentioned are so multifaceted, going into history of photography, both film and digital. I find that single articles designed to provide detailed information are an oxymoron. They remind me of a situation several years ago, when I had a brief conversation with a well know film photographer interested in and very motivated to learn Photoshop. He had the program newly installed on his laptop computer, and asked the question, what do I do next? I answered with yet another question, What do you want to do with your image? He seemed puzzled, but then I explained that he should consider getting a book or taking a course to become familiar with the program’s features. His reply was a classic, heard all too often in today’s instant gratification society, “But, I’m a quick study”.
I love it!!! I would be like my turning on my camera and asking him what do I do next? Could I expect to become Ansel Adams, because I was a “quick study”, and had a fully automatic SLR that someone had set up for me.
Albeit the detailed comparison! Anything comprehensive should assume some experience and knowledge of the subject on the part of the learner.
I get my most useful information magically, through experience, practice, reading, daily internet searches, related classes in art, and both traditional and digital photography, image processing, and conversations with other digital artists and photographers. On some days, there is even some time left to shoot some images. No individual source is comprehensive in my opinion, and you can sense that I am very opinionated.
No need to reinvent the wheel by writing yet another article on the pros and cons of ACR/Bridge vs Lightroom. The Adobe website has great information on the subjects, as well as current books on Digital Photography that I find relevant by Martin Evening, Scott Kelby, and older books up to four years old by Bruce Fraser and Jeff Schewe. Scott Kelby and Kevin Ames have current books on Lightroom and Photoshop for Photographers. Subscribing to iTunes video podcasts such as Adobe Creative Suite Podcast, Adobe Lightroom Killer Tips, All things Adobe, Creative Photoshop with John Reuter, Jeff Curto’s History of Photography, Layers TV, Peachpit Author Tips, Photoshop Essential Skills, Photoshop for Digital Photographers, Photoshop Killer Tips, Photoshop Kitchen, Pixel Perfect, and Understanding Adobe Photoshop are my favorites. Most update weekly, and the rest more randomly.
The Radiant Vista Internet Site hits both photography in detail and digital postprocessing as well.
Program comparisons abound on the Internet. Almost any question can lead on in the right direction on Google. The trick is to decide what question to ask.
TrudyKAS
January 22, 2008Deborah and Brian
I think you may find pertinent information on the two programs here:
https://learn.adobe.com/wiki/display/LR/Home
I’d be interested to share your opinions on your research.
Sara
February 4, 2008I need some advice.
Firstly, I am very new to digital photograpy so forgive me for sounding stupid.
I want to be as effeicient and productive as possible, but I don’t know a whole lot. I am trying to find a good way to organize my files and that’s how I found this blog. It’s all very interesting, but a little over my head. Do RAW files take up more space than jpg’s? One of my biggest problems right now is that my computer is pretty old. My husband says it’s dying and running out of storage. We are hoping to buy a new one soon, but in the mean time should I switch to shooting just RAW or should I wait? Same with organization. Now or later? Any advice on organizing family photos? While we’re at it, does anyone feel like recommending a computer? My husband thinks we should get an IMAC.
Thank you for any help you can offer.
Cooper
February 8, 2008Sara,
RAW files do take up more room, but it is well worth it. If your current computer doesn’t have the hard drive space, an external drive would be a good solution. They are pretty cheep, work with both Windows and Mac, and can be your backup drive when you get the new computer.
As for Mac versus Windows–that’s an epic question akin to religious wars! I have used both but stick with Windows because of my work. They are both good machines at this point.
Best,
Cooper