Making Fine Art Prints: Printing
I think we've covered the bases for general preparations, so now it's time to start making that print! This is really the first step in producing a fine art print, but it's not any more or less important than the other steps. If I could give just one piece of advice in this article, it would be to make the final print at the highest quality humanly possible.
Before we jump in, I should make my own printing situation very clear so there are no misconceptions. I use a local professional printer to produce my digital prints: Oscar Medina of San Diego Pictures. He's the real brains behind the whole printing thing, and he provides me with a top notch service. I don't handle any of the technical aspects of printing — I just bring him the files and give him the thumbs-up to press the go-button. So any technical information I provide here may be somewhat or completely wrong. As for darkroom prints… I do those myself, so I can speak to it with more confidence.
And again, we're just skimming the surface of this topic in this article — please ask specific questions and discuss technical stuff in the comments below.
The following tips mostly apply to digital printing rather than traditional darkroom printing.
PREPPING YOUR DIGITAL PHOTOS
Fine art photos are all about “high quality” — and that starts before you even see the image. Make sure that you're shooting at the highest quality available with your equipment. Shoot RAW, AdobeRGB, no downsizing, no compression, etc. Use high quality glass if you can, and avoid camera shake by shooting at a fast enough shutter speed, etc, etc.
When you process the image, workflow is important. Use 16-bit color depth and a high quality color space (I use AdobeRGB for color and Gray Gamma 2.2 for b/w). Watch your histograms while processing, and don't let your colors, blacks, or whites jump off the scale — you'll be throwing away good information. Obviously, make the photo look how you want, but don't go crazy on the adjustments if you're trying for a “natural” photo.
Calibrate your monitor so that you see a true representation of your image as you process it. Whether you print yourself or if you have somebody else do it for you, the printer will assume that your photo was processed with a properly calibrated monitor. When I take my digital files to Oscar, they look perfect on his monitor and they look perfect when they come out of the printer. We both use a color managed workflow [pdf 4.5MB].
My typical image prep involves processing RAW files via Adobe Camera Raw (same thing as Lightroom), and occasionally some Photoshop work if needed. I'll work with the colors, highlights, shadows, and midtone contrasts to get the image looking the way I want. I also put on a very small amount of sharpening and noise correction — just enough to make any artifacts go away.
In the last article, Andrew Ferguson asked “I don’t know what needs to be done to prepare them for print, workflow wise. I’m reasonably sure I need to convert to CMYK, but I don’t know how else to optimize my files (both b&w and colour) to ensure that what I see on the monitor is what I see on the final print.”
Maybe we can touch on this more in the comments, but I always shoot, process, and print using AdobeRGB for color images (I process and print black and white images with gray gamma 2.2). From what I understand, printers will do their own conversion from RGB to CMYK or grayscale. The important thing is to have a calibrated monitor and a calibrated printer — I know Oscar spends a good deal of time keeping up with this stuff to ensure that what we see on his screen is what we see coming out of the printer.
I could probably go on and on about this stuff in more detail, but we need to talk about other things! Chat-it-up in the comments.
PRINTER, PAPER, AND INK
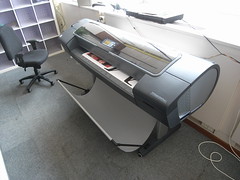
After your digital file is prepped, you'll need to decide on a printer. There are so many different types of printers and inks out there, I'm not even going to try speaking to the technical side of this. Just do your homework and find a system or method that suits your artistic needs. Chances are, you'll either have your own printer or you'll need to find a printing service (including PODs) or a local professional with the right equipment. With the current technology, any professional printer should be using top-notch equipment capable of producing archival prints ready for any gallery wall.
Paper, on the other hand, is more of the artist's decision than the printer or the ink. There are a lot of different papers out there, and each of them has a unique visual quality suited for different applications. You'll need to decide between gloss, semi-gloss, matte, metallic, canvas, watercolor, and other fine art papers with varying textures and colors. Even with all the choices available, keep the quality and archival life in mind — fine art prints are supposed to last a long time. Oscar actually has a book of the same image printed on various papers so you can see the different effects and outcomes. This is super-handy when deciding on papers!
I usually go for the glossy paper because I like my prints shiny, but it's an easy paper to damage and scratch. I'm considering trying out a few canvas prints at the suggestion of Oscar… I just need to find the right photos for it.
SIZING, SHARPENING, AND NOISE REDUCTION
Print size is a big decision — don't underestimate it! If you want to go really big, you'll need the pixels to back it up. As a rule of thumb, I try to keep my stuff above 100 pixels per inch. So a 12MP digital photo can be printed up to about 20″ x 30″ without a huge loss of quality.
Once you get at or below 150 pixels per inch, you'll want to consider upsizing the image on the computer so you can get a better quality on the printer. So for that same 12MP photo, once I go above 20″ wide on the long dimension I'll probably resize the image to larger dimensions to avoid printing artifacts. This can be done with Photoshop (or other post processing software), but something like Genuine Fractals will do a better job for you.
If you need to up-res your photo in order to print at the size you require, it's best to do your sharpening and noise reduction at the very end. If you're printing from the original (not resized) photo, just make sure to apply these things at the very end of your processing. And don't go overboard… make sure you view your digital file at 100% before finalizing the sharpening settings. Over-sharpening will definitely show up on the print.
[UPDATE] Gary Crabbe left a good comment below: it might be a bit clearer if it read, “You should *Always* do your output sharpening *After* the image has been (re-)sized to the final output measurements.” I think it might also be good to squeeze in a comment warning of over sharpening, and checking for sharpening artifacts at both “Print Size” and at “Actual Pixels”. Agreed! Thanks Gary!
One last thing on print size — know what size you want to print and WHY you want to print at that size. Take into account things like viewing distance, intended border, where you'll be signing the print (if at all), how it will be matted and framed, and how you're planning on transporting the print to the final owner. Most of these things will make more sense to some of you as we proceed through this series — so stay tuned for the next couple of articles.
PRINTING, HANDLING, AND SHIPPING
When you finally get to the point of printing, most of your prep-work should be done. If you've done you job right, you shouldn't have any problems. But no matter how much preparation you've done, it's always a good idea to print a test strip in order to evaluate the quality. Choose a section of your photo that contains critical information such as deep shadows, bright highlights, important colors, or people's faces. Print that section and make sure everything looks right. If it does, go for it. If it doesn't, go fix stuff. You'll save a lot of time and material cost if you work with test strips before making the final print.
After the final print comes rolling off the printer, make sure you handle it like a newborn baby. There's nothing worse than putting all that effort into a print only to bend it, crease it, or put a fingerprint on an otherwise perfect print. Use lint-free gloves to handle the print. Lay it out on acid-free paper. And don't force it into any position that it won't go naturally.
Larger prints can be rolled without damaging them — they can be flattened later. For anything larger than 11×14, I lay them face-down on acid-free paper and roll them into a 2″-3″ tube. Before rolling these prints, be sure that they've had time to properly dry so the ink doesn't smudge. Other than that, use common sense!
When it comes to shipping, be careful how you package things. If the print is fairly small, you can use photo mailers available for 8×10 or 11×14 prints. Anything larger and you'll probably want to send it in a tube. Even with tubes, some extra precaution should be taken. I actually had a print damaged recently because the Post Office just doesn't care that you're sending sensitive material. After talking with Oscar, he mentioned that he likes to roll his prints about 1″ smaller than the diameter of the shipping tube and float it in the center by placing extra packing paper at the ends. So even if the tube gets crushed or bent (which mine did just recently — sorry Mom), the print will likely survive due to that extra buffer of airspace.
FOR THE ANALOG FREAKS
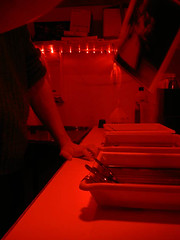
Probably not the most popular topic, but I know at least one or two of you are interested in my darkroom workflow. First of all, I use high quality enlarger lenses and easels. Enlargers are no different than cameras, only opposite — so use good stuff. Also, for signed prints, I use fiber base paper and I tone with selenium for archival longevity. Proper fix and wash are also key in the quality of the print. I don't have actual data points to back up my suspicions, but I'd expect my darkroom prints to last at least 100 years, probably more.
At any rate: print on fiber, don't skimp on the fix and wash, and tone your prints. These things take FOREVER to print and finish, but it's totally worth it. If you analog printers have any specific questions, hit me up in the comments — I could talk for days on this stuff.
SO WHAT DID I MISS?
The topic of printing requires a huge series of article on it's own, so I'm sure we didn't cover everything here. If you have specific questions about printing methods, techniques, and theories — do ask!!! I spoke with Oscar (my professional printer and fellow artist) about this article and asked him to chime in on the technical stuff. He's more than willing to answer our questions and take part in the discussion. This guy is a fountain of knowledge on the topic, so don't pass up the opportunity to tap into him!
FOLLOW THIS SERIES OF ARTICLES!
BACK — PREPARING
NEXT — SIGNING
Oscar Medina
June 2, 2009Hi Brian and Gary,
Most of my clients (businesses decorating their office spaces with my artistic creations) purchase fairly large format prints (in the range of 30 X 45 inches or larger) so I am always looking at improving the quality of the prints I delivery to them. After all, it’s my signature on the print so quality is very important to me.
I usually get better results using GF, though if you have the sharpness setting set too high, it can look a little “painted”.
I prefer to do sharpening in Photoshop just before printing and after scaling with GF. Sometimes pre-sharpening can be effective for certain subjects.
I periodically test by taking a special file I’ve created and then step sizing it using Photoshop and standard sizing using Genuine Fractals. I size to a file size that is equivalent to 40 X 60 inches, then compare the two files side by side. I’ve also compared one-step sizing with Photoshop vs. GF. GF wins on apparent detail retained and edge definition.
Regardless of which method I use in Photoshop, GF usually gives me better results. I’m currently using Photoshop CS4. On some subjects, Photoshop does a better job.
Most photographers are not aware that you can also just send the original (unscaled) file to the printing system but set the printer settings to print at the size you want and the machine will do the math. The prints usually look VERY good and the average person wouldn’t be able to tell a print, sized by the printer, apart from one presized using Photoshop or GF. Isn’t that interesting? Sending the original file to the printer also speeds up the printing process as smaller files are flowing over the network or USB connection. The largest print I’ve printed to date is 40 inches by 120 inches. The print is hanging in the lobby of 300 Montgomery in San Francisco.
I hope the above helps answer your questions.
Oscar Medina
San Diego Photos and Prints
858-274-0665
p.s. for certain subjects Textured Fine Art Paper or Artist Canvas just looks fabulous!
Brian Auer
June 1, 2009Now that you mention it, I may have seen some comparison between Photoshop and Genuine Fractals… maybe at “The Online Photographer” or something. I can’t recall, and I can’t seem to find it. I’d be curious to hear if Oscar has done his own tests.
And thanks for the comment about sharpening — I’ll toss it into the article as an update. I definitely agree: sharpening happens last!
Sean Galbraith
June 2, 2009There is also the differences in printing types… C-Print, Lambda, Lightjet//Chromira, pigment vs. dye inkjet…
Regarding canvas printing, or other non-paper methods, if you are interested in the “fine art” category of photography, I would be cautious. This world has not caught up in its valuation of alternative materials. Inkjet prints have come into their own (assuming you’re not using some $99 HP junker of course) and are selling at the big auction houses. But not canvas.
My camera World
June 2, 2009For images that are increased less than 100% with Photoshop it is hard to tell the difference. You need a loupe and what buyer is going to examine each pixel. About 100% GF stars to show some improvements but not much. It real depends on the detail.
For those wishing to produce Fine Art prints do take the time to print a full size test print. Examine this over a week or 2 to study the areas that you think might need improvement. Look at it as a living object, not just mechanically. Then decide how you want your finalize your prints.
Niels Henriksen
Sean Galbraith
June 2, 2009Living with the print, as Niels says, also gives you the confidence in how it will look once the image has fully cured (as in the case with inkjets)
Oscar Medina
June 2, 2009Sean makes a very good point.
The big auction houses are not selling prints on canvas but I don’t know many photographers that are trying to sell their prints using that method. I make a lot of money every year selling my own prints-on-canvas to home owners with upscale homes. Businesses that are decorating their offices and want a more upscale look also go with canvas prints. They usually want a large format print that is ready to hang, either framed or in a gallery wrap configuration. It all comes down to the art of selling and perceived value.
Sean Galbraith
June 2, 2009I agree. Currently, though, in the “art world” there is no established perceived value for canvas photography prints (yet). Individual buyers might/do enjoy them, and that’s great. But in the larger art market itself, they have not come into their own yet.
(I am co-owner of a photography art gallery)
Oscar Medina
June 2, 2009HI Sean,
I agree with you that the “art world” has no established perceived value for photographic prints on canvas. That doesn’t bother me at all. I don’t sell my prints to the “art world”. 🙂
Sean Galbraith
June 2, 2009And when the art world comes around, you’ll be well positioned to capitalize. 🙂
Federico
June 2, 2009Thanks a lot for these tips! I’m making a 24 x 16 ” print today… I’ll let you know how it goes!
Brian Auer
June 2, 2009It’s interesting that canvas isn’t more popular or accepted. Every large print I’ve seen on canvas looks downright amazing, though it takes a certain type of image to pull it off.
Tom
June 3, 2009Great series Brian. A resource that I have found helpful when sending out photos to print is DryCreekPhoto.com While I haven’t seen them offering custom printer profiles for some time, they do update their enhanced profiles for customers like Costco. I’ve been using their profile for my local Costco and they come out great. They do offer a tutorial on how the Fuji Frontiers and Noritsu’s like to have their files sent to them. Of course all of this relies on a color managed workflow as you mentioned. I started using Costco comparing it to my prints from my Epson. The only downside is two paper choices, gallery wraps are available (2 sizes). These articles have gotten me inspired again to start making my own prints again.
Topslakr
June 27, 2009I guess you could call me an analog freak. I shoot film at about 50/50 to digital and develop my black and white film. As of late I have been trying my hand at making prints in the dark room. Well, I tried my hand in the dark room, got a massive headache and threw away a lot of prints. I have sorted out a solution to my ventilation issue but am a little hesitant about making more prints. I’ve read books, I’ve watched video clips but no one that I can find is talking about the art of it. Everyone seems to talk only about the mechanics. I would be thrilled if you did an article or series on you dark room process. I agree that it will only pertain to a small percentage of your readership but everywhere I look people are getting back into film. No one is dropping digital but film is good at somethings, and digital at others. Getting a more modern, real world take on your workflow would be excellent.
Also, I would happy to hear/read/watch you ‘talk for days about this stuff’… bring it on!
Topslakr
Oscar Medina
June 28, 2009Hi Topslakr,
You are right. The art of creating prints in a darkroom seems to be quickly fading away. I had my own darkroom for about 20 years and then sold everything when I started shooting with digital cameras and doing my printing on a fine-art-printing system. I remember the trays, chemicals, special timers, enlarger, dryer, etc. What I found especially useful were custom made “burn” and “dodging” tools I made from coat hangers and cardboard I spray painted black and then attached to the coat hanger pieces with tape. You can also use black card stock you can find in any Walgreens, Rite-Aid, etc. in the school supplies.
I had several shapes for dodging: square, diamond, rectangle, circle, elipse, star, half moon, quarter moon. I Also had similar shapes cut as “holes” in cardboard for “burning in” an area.
Nice thing about cardboard or cardstock. If I needed a special shape I would just make it on the spot. I always had a few spare 1 foot coat hanger pieces in a tray just waiting for their cardboard attachment and a box of cardboard pieces, plus a roll of tape.
Are you working exclusively in black-in-white or color, or both? Color requires extreme temperature control. Black and white is a lot more forgiving and you can watch the print develop under a safety light. Color can be developed in a fully lit room but you can’t see the paper while you are processing the print. You can “force” a portion of a black and white print to develop faster by running your fingers over the area while it is in the developer. This used to give me “smelly fingers”. 🙂 But worked great.
Ansel Adams used to spend hours working on a single print. A true darkroom artist.
Oscar
Topslakr
June 29, 2009I’m just doing B&W right now. Color seems to add a lot of complexity and precision that the tools I’m using just aren’t going to handle right now. Most of the gear I have I picked up on Freecycle or on the side of the road. I want to get into the darkroom and make some prints but I’m a little gun shy at this point. Developing the film is a breeze for me now.. it’s pretty simple when you get down to it.
I’ve been looking at Ansel’s series of book and I’m going to start buying them over the next few months.
Oscar Medina
June 29, 2009Black and white prints are really easy. The most complicated part is getting the overall exposure set correctly. I used to take a single small sheet of paper (4 X 6 inches) and lay a cardboard seet over it, leaving only 3/4 inch or so exposed, then set the enlarger exposure to 60 seconds and start the exposre. After 10 seconds I would slide the cardboard down to reveal another 3/4 inch and do the same every 10 seconds until the exposure ended.
The result is a set of strips with exposures that are 10 seconds apart. The darkest strip will be 60 seconds. Each adjecent strip will be 10 seconds less. Examination under regular light will then give you the best exposure for the density of the negative. If is one is too light and the next is too dark add 5 seconds to the light one or subtract 5 seconds from the dark one to interpolate the time needed and then set your exposure timer on the enlarger. 9 times out 10 this worked perfectly.
I also liked to keep from contaminating my chemicals as much as possible so I did the following when developing.
Developer, quick rinse in water, stop bath, quick rinse in water, fixer, water rinse, dryer. Doing it this way makes the stop bath and fixer last a lot longer before you have to make another batch.
And this next tip is REALLY IMPORTANT . . . be sure to have fun!
– Oscar
p.s. If you are an Ansel Adams fan and live in the San Diego area, there is an excellent Ansel Adams exhibit at the Museum of Photographic Arts at Balboa Park going on right now.
https://www.mopa.org/exhibitions/current.htm
Mark Peters
July 5, 2009Just found your site. Great article. I have always wanted to to a ‘”fine art” print of some of my shots but just wasn’t too sure on how to do it. I think this will give me a little more confidence in moving forward with this. Thanks