60 Second Post-Processing Technique
The technique outlined here really just applies to a first round of processing — this might be acceptable for posting to Flickr, but a fine art print would require much more time and effort on your part. Also, I'm not talking about doing black and white conversions, crazy artistic interpretations, creative cropping, etc. We just want to make the photo look more natural at this point.
60 seconds may sound fast to some people, but it may sound like an eternity to others. Sure, it's way too short for print preparation and it's way too long for working through hundreds of stock submissions that might have basically the same white balance, exposure, and/or subject matter. But this method is intended to use your time effectively while giving each photo individual attention.
The steps below are for Lightroom or ACR users working with raw digital files.
SHARPEN AND REDUCE NOISE (0 SECONDS)
In most situations, the sharpening and noise reduction settings can be applied in batches for any given camera and ISO range. Just build a sharpening and noise reduction preset and apply it to all the images you'll be processing further. This can be done before or after any other editing, but I like to get it done up front so I don't forget.
The exception to this rule of batch processing is when you have photos outside the “normal” camera setting ranges. This means that photos with high ISO or long handheld shutter speeds will typically require some individual attention, but everything else can be processed with presets for typical use.
STRAIGHTEN AND CROP (+10 SECONDS)
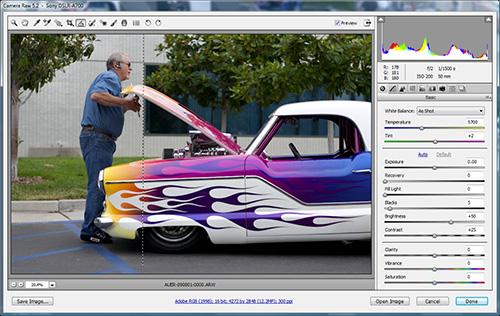
Not every photo is going to require this step, but let's just include it as a worst case scenario. The main intent should be straightening anything that's slightly misaligned from what you want. I'd say keep the creative cropping to a minimum at this point — you can go back during in-depth processing and toy around with it.
To straighten, just use the Straighten tool and drag your horizontal or vertical line. The rotated crop will automatically be applied and you can move on to the next step.
WHITE BALANCE (+15 SECONDS)
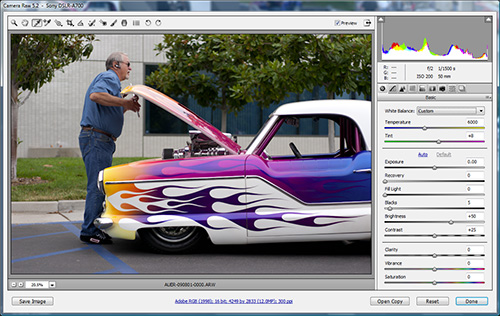
Cameras aren't very good at picking white balance, so some adjustment is usually beneficial. By default, your image white balance may be set to As Shot. What I like to do is highlight the pull-down menu and scroll through the auto and predefined settings to see which one gets me the closest. In some cases this will be enough, in other cases you'll have to make a slight adjustment manually. If you have a good neutral gray source in the photo, you can also use the White Balance Tool to save some time.
I would suggest doing this step before making any basic adjustments because I've noticed that different white balances will give different automatic exposure settings in the next step.
BASIC ADJUSTMENTS (+25 SECONDS)
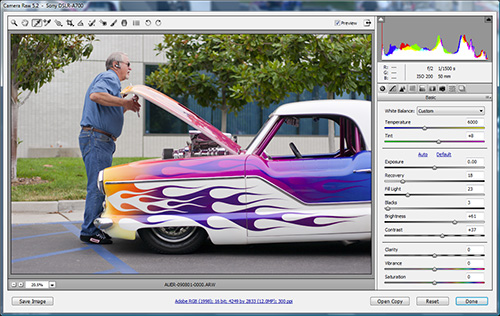
This is an area that you could spend a lot of time messing with, but you can also get a really good result with minimal effort. The first thing I do is hit the Auto and Default adjustment a few times back and forth so I can evaluate which one gives a better starting point.
Once I have my basic starting point, I take a quick look at the histogram to evaluate where things are at (I'll actually do a separate article for working with histograms). Then I just run down the group of sliders from top to bottom until I get things pretty close.
- Modify your Exposure if the image is inherently too dark or bright.
- Add Recovery to pull back heavy or clipped highlights.
- Add Fill Light to push up heavy or clipped shadows.
- Add Blacks if your shadows look dull.
- Modify your Brightness to shift the overall brightness or darkness.
- Modify your Contrast if the image looks too flat or too punchy.
You could end your processing right there if you punch up the contrast enough, but I like to leave it a little flat for the next step. I also don't usually apply any Clarity, Vibrance, or Saturation adjustments in this round of editing. You'll find that a good contrast and tone adjustment will really boost the colors.
TONE ADJUSTMENT (+10 SECONDS)
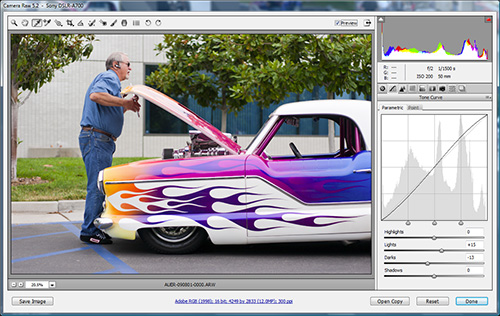
I actually find that the Tone Adjustment does a better job at dealing with contrast because it offers more control by splitting the highlights and shadows. Most of the time, I'll only adjust the Lights and Darks sliders until I see a pleasing contrast level. Many images will only require a slight “S curve” to get you where you need to be.
Now, if you don't leave the Basic Adjustments slightly flat, you'll get really exaggerated contrast results after applying Tone Adjustments. Then you'll have to go back to the other panel and turn things down — which of course takes more time.
WHAT DO YOU THINK?
Am I way off base here? Am I spending too much time on basic first-round adjustments? Am I not spending enough time per image? What do you do with your images you intend to post or share through informal mediums? Here's the before with the example photo used above:

Not a huge difference, but quite noticeable at full screen. At any rate, it's in a more “natural” state and it should be much easier to evaluate and detail process from here.
I would say that the 60 seconds could be reduced to 30 if several things fall into place: straight horizons out of the camera, correct white balance out of the camera, and good exposure out of the camera. A well captured image requires very little post work, but it should require some if it's a raw image. On the other hand, you could easily require 2 or 3 minutes per photo if you're doing a lot of corrections due to a poor capture.
Adam
December 18, 2009I’ve always been told sharpening should be your last step, which makes sense to me.
Maybe it would work to have a first pass, second pass and final pass. The first would be the stuff you do to every photo, the second would be adjustments on a more individual basis, or if you decided that all of a set of photos require a particular effect added. Finally sharpen, watermark perhaps and publish / archive / print.
I’ve also been told cropping is first. This is particularly so you don’t end up doing something like dust removal on a part of the photo you later toss, so after sharpening/noise reduction is not a problem.
Perhaps grouping by what can be done by a preset, or adjusted for each batch of photos, and what can’t… (I had to google my past feeds to find out which photo blog had done that article about pre-sets. It was you of course, linked at the top of this very page)
Richard Cave
December 18, 2009Great post Brian,
Here we use WHIMS
W: White balance check
H: Highlight warning turned on (to tell if portions of your shots are blown out, or overexposed)
I: ISO check (correct ISO for your surroundings)
M: Mode check (whether aperture priority, program, or manual mode)
S: Size (image size and quality settings
this is done prior to job, however on post we write whims down on a piece of paper and go through it in photoshop/lightroom
White balance in levels
Highlights using the levels toggle whilst pressin alt
ISO check for noise and colour noise
mode check focus and look for sharpening problems
size ie crop do I need it and will it interpolate fo large print
Scott Kelby uses WHIMS whilst shooting, however we use it post, just a quick and dirty way to get it done.
Rich
Brian Auer
December 18, 2009@Adam — When working in Photoshop or a similar software that uses layers, sharpening should definitely be the last step. With Lightroom and ACR, it really doesn’t matter because all the settings are applied at the same time. Even with Lightroom and ACR, it may be best to apply sharpening at the end if you’re doing it visually and on an individual basis. But the example above uses a preset I made that works for most of my photos. And yes, I would suggest a final crop before doing any detailed processing.
@Richard — I like that… not a bad set of reminders for shooting and processing (and easy to remember).
Adam
December 18, 2009I hadn’t been aware of the difference, thanks for pointing it out. I do still wonder, if this is the first round of processing, wouldn’t further detailed processing potentially be done in something like photoshop?
Thanks again for the article, and blog in general.
Brian Auer
December 18, 2009Further processing could be done in whatever you need. I usually try to keep it in ACR so I don’t have extra bulk in my archives, but sometimes I’ll need to pull it into Photoshop. Really though, even heavy processing can be done without Photoshop. Here’s an example: https://epicedits.com/2009/07/17/salton-sea-sunset/
BH
December 18, 2009Brian: A number of your steps could be set up as your default settings, including sharpening, noise reduction, and tone curve (using Medium Contrast, perhaps). These settings can be applied per camera and per ISO if you want (under the Presets tab in Preferences). Matt Kloskowski adds an additional first step beyond your list: choosing a camera profile (under Camera Calibration) that is best suited to the subject.
Adam: Lightroom and ACR implement what is known as capture sharpening to overcome the softness that results from the anti-aliasing filter in the camera. Lightroom also offers final sharpening (with selections for screen or print as well as strength) in the Export and other output functions. If you edit the file in Photoshop (using Ctrl+E), the output sharpening is not applied.
Alex C.
March 13, 2010Nice technique! It is really easy to get decent looking photos nowadays, yet many people fail to do so!
Maybe if you provide them with techniques like these ones they will be able to put some effort in it!
Anyways, nice post once again!