The Place To Be

[Print Pricing] [Contact for Signed Prints] [See it at Flickr]
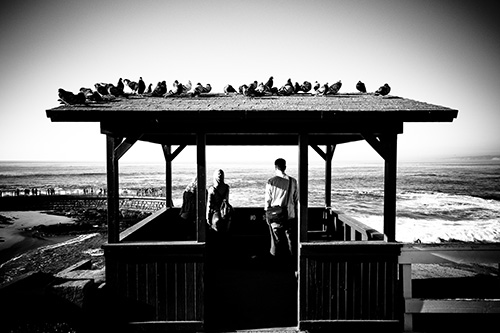
This shot was taken during the La Jolla photowalk in early February. At the time, I found the scene to be very interesting — the hut, the birds, the people, and the ocean in the background really seemed to work together in this candid shot. I kept things fairly well centered because of the strong symmetry already present in the hut. The Birds and the people served to break up that symmetry in isolated areas, so I didn't feel I needed to break it up even more. Lucky for me, I also left some extra room at the top of the frame, which served as a nice backdrop for some heavy vignette.
All of the following post-processing steps were done with Adobe Camera Raw — no Photoshop was used on this photo.
- Untouched RAW Image
This is what the image looked like straight out of the camera. It could probably work as a color image too, but I wanted to go colorless. - Black & White Conversion
Before doing anything, I switched to grayscale. I pushed the red, orange, yellow, green, and aqua to negative compensation while the blues, purples and magentas were pushed in the positive direction. - Basic Adjustments
I left the white balance set at a temperature of 5800 and a tint of +3. I left the exposure, recovery, and clarity set to zero, while I boosted the fill light to 46, bumped the blacks up to 36, dropped the brightness to 16, and pushed up the contrast to 52. - Tone Curve Adjustment
Using the parametric tone curve, I set the highlights to +41, lights to +39, darks to -44, and shadows to -76. This gave me the strong contrast I was after, and I actually pushed a bunch of the highlights and shadows off the histogram. - Vignette and Sharpen
In the lens correction menu, I set the vignette to an amount of -76 with a midpoint of 19 — and this gave me the strong frame around the hut while filling in some of that sky. As a last step, I set the sharpening under the detail menu to an amount of 50 with a radius of 1.5 pixels.
Enjoy!

Ken Maurer
February 29, 2008Nice image. The center pov makes a strong image, the vignette is a nice touch too. A great example of how photography “rules” should never be hardfast. Thanks for sharing your workflow too. Your blog is the first I visit in my reader.