Another Day At The Beach

[Buy Prints] [Buy Rights] [See it at Flickr]
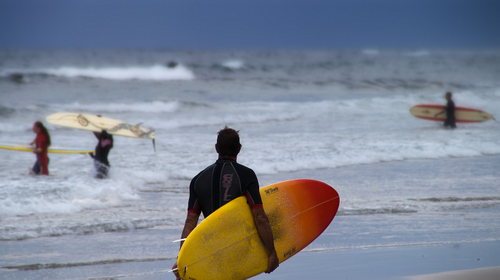
I showed this one last week as part of a project entry, but I didn't go into any detail on how it was created. I took this photo on the beach at Encinitas, which is just north of where I live by a few miles. I was with my Dad (who was visiting for the weekend) and while he was testing out his new 2X teleconverter with his 300mm lens, I was forced to focus on subjects a little closer to dry land. It was really overcast and a little chilly, but that didn't stop many surfers from getting out in the water. As this guy walked toward the water, his surfboard really caught my eye so I took a few shots. I'm fairly pleased with the outcome of this image, but my vertical composition was ever so slightly off — I would have like to gotten the bottom edge of the surfboard in the frame.
- Original JPEG
Crooked, slightly underexposed, and washed out. The JPEG really sucked for color and contrast on this one. - Processed RAW
Straighten, crop, white balance adjustment (slightly cooler for mood), and contrast improvements. Better than the JPEG, but still not great. - Curves for Contrast
Did an “S” curve adjustment to boost the contrast, which also increased the perceived saturation and really made the cool tones stand out. - Layer Mask
I wanted to blur the background even more, so I created a layer mask by using the gradient tool and brushing out the surfer in the foreground. - Background Blur
Applied a Gaussian Lens Blur to a copy of the work thus far and attached the layer mask to preserve the foreground elements and allow the blur to fade into the background. This step really helped defocus the contrast in the water and bring more attention to the main subject. - Darken Background
I used the same layer mask and applied a curves adjustment layer to effectively darken the image. This produced a dark sky effect and tool some emphasis off of the upper portion of the frame. - Inverted Layer Mask
After selecting the previous layer mask, I inverted it so I could work on the foreground elements without effecting the work done on the background. - Lighten Foreground
Applied a curves adjustment layer to brighten the image and pull more attention to the foreground. This also produced more detail and contrast in the surfer's wetsuit while lessening the bigger contrast differences in the shore area. - Curves for More Contrast
Yes, I just reduced the contrast in the last step, but I wanted to bring back some of the highlights to make some of the background elements a little more pronounced. This also really cooled of the image quite a bit. - Foreground Sharpening
I applied an Unsharp mask at 81% 1.5 pixels and a threshold of 1, while also masking with the inverted layer mask so I could preserve the background blur.
Enjoy!