Fool-Proof Photoshop Airbrushing for Dummies
Guest post by Alexis Bonari… A quick and painless way to “airbrush” a picture in Photoshop. I showed a method for digital airbrushing using Photoshop in a past article, but this method takes a slightly different approach.
Hi dummy! So glad you could join us today. Just kidding, just kidding. With the advent of Myspace, then Facebook, and who knows what’s coming next, the whole world has become an endless source of perfect skin and magazine cover worthy supermodels. Now that Photoshop is a verb and household name, you might as well get in the know and make yourself (or your girlfriend/boyfriend) uncommonly perfect.
Here’s what you do.
We’ll be using this image, available through Wikimedia Commons:
https://commons.wikimedia.org/wiki/File:Bangalore,_India_Model.jpg
Save it to your computer.
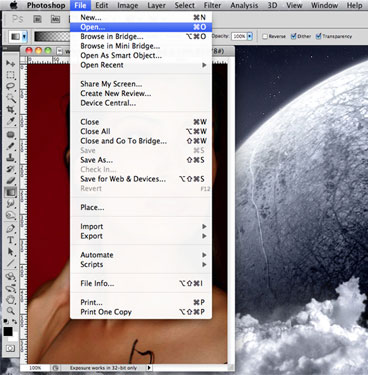
1. Open your image in Photoshop. ( FILE -> OPEN )
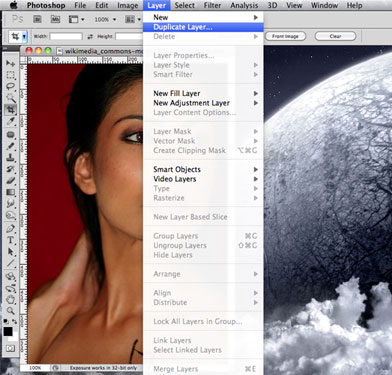
2. Immediately duplicate your image’s layer. ( LAYER -> DUPLICATE LAYER )
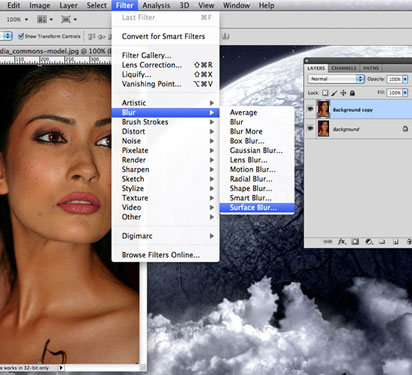
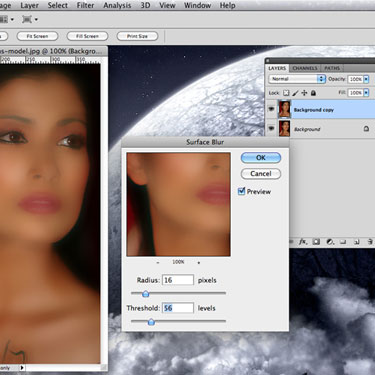
3. Make sure your new layer is selected, and then Surface Blur that layer, so that your image looks like this one. Play with the Radius and Threshold to achieve this effect.
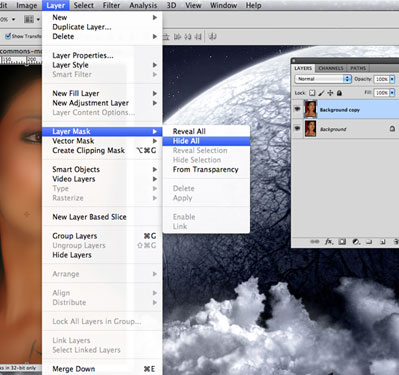
4. Now, create a layer mask with this newly blurred layer, and make it set to HIDE ALL.
5. Select your paintbrush, make it big, and reduce its “hardness” considerably. Then change your brush color to WHITE (#FFFFFF).
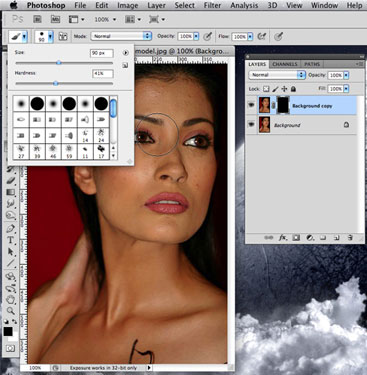
What has happened so far? You will notice now that you are back to your original image. What has happened behind the scenes is that that blurred image is still there, only that it is now hidden behind the layer mask. This mask will only show parts of the image that are painted in white. So, your next step is where the fun begins!
6. Making sure that your blurred layer’s Layer Mask is selected, you will now generously paint over the areas you want to “airbrush”. You will notice that as you paint, the blurred image will start appearing. Be cautious to not paint over eyes and lips, as you will want their defined textures. You will also find it useful to change your brush size to accommodate around the eyes and lips or any other nooks and crannies that might need you to get in there. It doesn’t have to look perfect at this point. We’ll fix that in a minute.
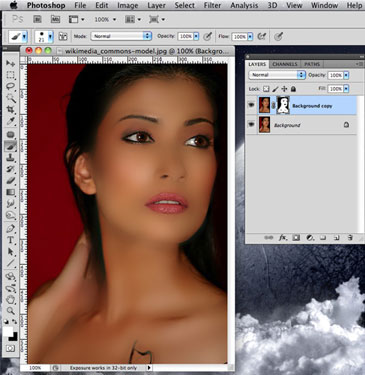
7. This is what my layer mask actually looks like.
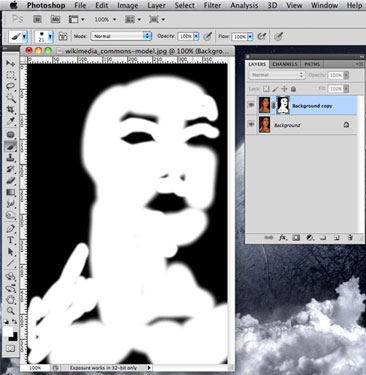
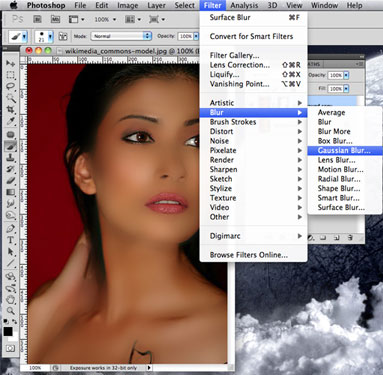
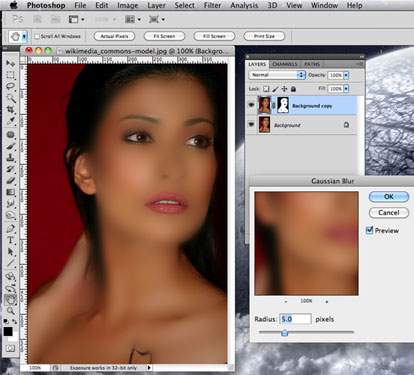
8. Now, with that all done, we’re going to smooth this out even more. Select your GAUSSIAN BLUR filter and blur stuff even more. I like setting it to about 5.0 pixels for this image.
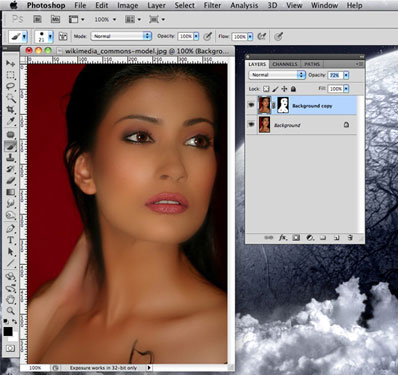
9. Finally, making sure that your blurred layer is selected, adjust that layers Opacity, to blend the blurred effect with the original. In this case, I settled on 72%
Once your image looks the way you want it to, it is ready for saving or exporting for web, or whatever you would like to do.
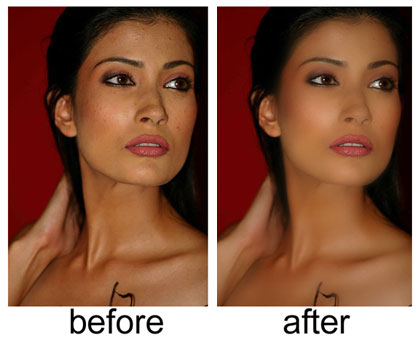
Less than 10 easy and quick steps, and you’ll have your images looking like the pros! I knew you could do it. Great job!
Bio: Alexis Bonari is a freelance writer and blog junkie. She is currently a resident blogger at onlinedegrees.org, researching areas of online degree programs. In her spare time, she enjoys square-foot gardening, swimming, and avoiding her laptop.