Best Studio Lighting Tutorials?
So… it pains me to admit it, but I've turned a new page today. I finally learned something about artificial lighting (studio lighting to be exact).
I know… *gasp* say it isn't so!
But don't worry, I'm no expert quite yet. All I basically learned was that you set your camera to ISO100, f/8, and 1/200-1/250 seconds, then tune your exposure with the power settings on the lights (at least that's the “norm” for this particular studio). Maybe not Earth-shattering for those familiar with lighting, but this is all new for me (and maybe some of you).
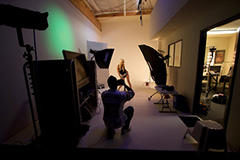
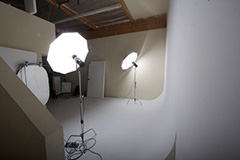
I've got a model shoot coming up next weekend for Green Man T-Shirts and I spent about an hour at DK3 Studios yesterday with Dave King learning how to work his equipment. (Cool dude, by the way. And an awesome/affordable studio here in San Diego).
I'm still blown away by how simple this stuff can be if you switch the camera over to manual and follow a few basic rules… maybe I'll post more about this after the photo shoot next weekend, but right now I'm looking for advice.
Assuming that the technical side of the equipment is not the issue, I'm still up against lighting techniques for photographing models (upper body shots, portraits, etc.).
SO HERE'S MY QUESTION TO YOU:
What are the best studio/model/portrait lighting techniques that you've encountered?
I'm looking for links to articles, resources, ebooks, blogs, etc. Here are a few that I've gathered myself…
- Explained lighting schemes
- Portrait Lighting set-ups
- Fashion Photography Lighting Diagrams
- Portrait Lighting Cheat Sheet Card
- Visualizing Studio Lighting
I'm sure there are many more out there, so feel free to share in the comments. If we get enough, I'll post them in an article next week so others can check it out.


Kris Mitchell
March 19, 2010One thing I’ve been trying to do this year is “Pay it Forward”. Giving back to the community by doing free portrait sessions for the people that give every day like the local church & Fire Brigade. And giving back to the photography community by trying to give as much information as I can about a personal project I’ve taken on for 2010.
I’ve doing one Self Portrait a week for a year – nothing out of the ordinary there, lots of people do this, some do it every day for the whole year! What I’m trying to do is show a larger part of the process though.
By providing the lighting diagrams of (almost) every shot and showing the contact sheets from the shoot itself (because I know I don’t just rock up and get the picture the first time), I’m hoping to give and inspire the community that inspired me in the first place to expand my photography.
If you’re interested – the set can be found on my Flickr stream here (and if that link doesn’t work try this: https://bit.ly/cSITKy )
Thanks Kindly,
Kris
Steve
March 19, 2010I have learned some amazing techniques from Zack Arias. His One Light Workshop seminars / DVD’s are incredible and definitely worth their price.
In a nutshell, put your camera into full manual mode, set your shutter speed to your flash sync speed. Use your aperture to control the exposure settings (only adjust your power settings on your flash if you need to specify a specific aperture). Adjust your shutter speed to allow additional (or less) ambient light into the equation.
Check out his sight (or Flickr group) for some great shots using this method.
Nathan Nontell
March 19, 2010I think you’re going to find just what your looking for at…
https://strobist.blogspot.com/2006/02/welcome-to-strobist.html
William Beem
March 19, 2010One of the things you need to remember is that your sharpness comes from the flash of the studio light and your shutter speed lets you worry about how much ambient light to allow into the scene.
I typically start at my ISO 200 (for my D700) 1/125th & f/8 and then adjust from there. Sometimes, you may want to blend ambient light with your studio light. Since the sharpness comes from the flash, you can drop the shutter speed quite a bit to let the ambient light to creep in and make the scene. For example, I shot this at ISO 200, F/8 and 1/8 second hand-held.
https://www.flickr.com/photos/wbeem/4122429341/in/set-72157622725260183/
Shawn
March 19, 2010I can’t say enough good things about Don Giannatti’s blog, Lighting Essentials.
I would also highly recommend his Learn to Light workshops… Of all the money I’ve spent on this hobby, the $450 I spent on that workshop was the best money I’ve spent so far.
Tomas Webb
March 19, 2010Yep, Zach Arias is the man. I can’t recommend his DVDs enough!
Janne
March 19, 2010A general stylistic tip: Check Flickr, especially the Strobist group, and other sources. Make note of what lighting styles are currently popular. Then don’t use them. You don’t want to disappear in an ocean of images all in the same lighting style of the week.
Kunal Daswani
March 20, 2010Pro photographer from Chennai, India.
Learnt a lot from these guys when starting up…
https://www.youtube.com/user/prophotolife
Watch all videos
and
Digital Photography 1 on 1 series here
https://www.youtube.com/user/snapfactory#p/u/68/zQBa2y9NYIE
and of course strobist
udi
March 20, 2010Hi Brian,
Nice to see you jump into the wonderful world of studio and lighting.
I second both wizwow (Don) and Strobist (David) as great lighting tut sources as well as Kirk Tuck and Syl Arena:
https://visualsciencelab.blogspot.com/
https://pixsylated.com/
Don Winkler
March 21, 2010I will thridly suggest Dave Hobby from the strobist blog and Don Giannatti (Wiz WOW) of lighting essentials Both can get beginneers going and keep pros learning.
Kirk Tuck is a photograpers photog
Joe McNally is the next best thing to sunlight when he pulls 20 strobes from his backpack
Don Winkler
March 21, 2010Oh yea…Zack Arias one light wonderboy…..also fills in as ZZtop front man
Mike Blanchard
March 21, 2010Any material by Chris Grey is a great resource. Here is a list of Chris Grey articles on ProPhotoResource which is in itself, a veritable treasure trove of lighting/studio resource.
https://prophotoresource.com/index.php/Find-by-Author/Chris-Grey/View-all-articles.htm/a>
Stefan Tell
March 21, 2010I do a lot of portraits in my small studio, and try to document them with diagrams and all, as often and accurate as I can. At first I did it to learn what works and not, but later on, to share with others.
My studio lighting setup diagrams can be found on my blog, together with examples and a lot of text trying to explain what I wanted to achieve.
https://www.stefantell.se/blog/
This might be shameless self-promotion, but I post it anyway, hope you will find it helpful.
Damien Franco
March 21, 2010Here’s one on “dramatic lighting”.
https://www.yourphototips.com/2008/04/18/lighting-techniques-momentous-breakdown/
Yep…it’s a plug.
Jay
March 22, 2010If you have the time and $25.00 (or $19.95 if you’re a member of NPPA) you can sign up for one month of Kelby Training videos. Watch the videos by Joe McNally (it’s amazing what he can do with speedlights. Dude uses iTTL and Nikon CLS and adjusts exposure accordingly with compensation) and David Ziser. I learned so much from those two.
Several people have mentioned Zack Arias. I had the pleasure of somebody giving me their One-Light DVD they bought from him and I couldn’t believe how simple much of the lighting setups are.
Andrew Boyd
March 22, 2010Damn, Brian. I don’t know what to say….so you’ve come over to the Dark Side, eh?….Go look at Avedon’s studio portraits (Richard Avedon). Nobody’s ever done it better. (https://www.richardavedon.com/#p=-1&at=-1)
As with every other photo shoot, it ends up not being about the technical stuff, but about WHETHER OR NOT YOU HAD A GOOD IDEA FOR THE SHOOT (!!)
Good luck and I look forward to hearing how it went!
Andrew
TheDiscerningPhotographer
Andrew Boyd
March 22, 2010Second thought: I’m remembering being at the famous Missouri Photo Workshop, young, anxious, wanting to prove myself, and someone asked if we had to use just ‘available light;’ or could we add strobe…..Bill Epperidge(https://billeppridge.com/blog2/), a bigshot photojournalist who was one of our coaches that week, said that ‘available light….was whatever light was available.’
Pretty soon you’ll find the big strobe lighting stuff is just another tool in the toolbelt, something else to use when needed.
Have fun with it!
Andrew
TheDiscerningPhotographer