Making Fine Art Prints: Framing

We're really coming along on this series! Almost to the finish line now! In this article, we'll be covering the topics of matting, mounting, and framing your fine art prints. These are really the final steps in producing the artwork, and they're equally important as the other steps.
Some artists insist on defining and providing the matting and framing as part of the final display, while others are okay with leaving it up to the recipient of the work. There's no right answer — you're in charge and you get to decide what to do. Personally, I'm more inclined to let the buyer mount, mat, and frame the print so that it fits well in their home or personal gallery. For the work (of other artists) that I hang in my home, I like to do these final touches myself so they all match each other.
So if your work is going to a private collector, you might just ask them what they want in terms of matting and framing. If the work is for a gallery or exhibit, they might have strict guidelines for the final presentation. Every situation will be different, so be flexible!
THINKING AHEAD

Your print and paper dimensions will be determined by the intended matting and/or framing (along with where you sign the print). You'll want to leave a bit of extra space around the photo so that it can be properly displayed. The mat will sit over top of the paper, so account for at least 1/8″ to 1/4″ of extra space for this. If you want to leave a white border around your photo in addition to the mat, be sure to leave that much extra space. As a rule of thumb, I tend to leave 1/2″ to 1″ of extra paper around my prints — depending on the intent for final display. You can always cut off the extra paper, but you can't add paper back to the print. So leave lots of room if in doubt.
Also be aware that standard mat windows are slightly smaller than the stated size. An 11×14 mat or frame will be a bit less than 11×14. If you print at exactly 11×14, you will cover a small amount of the image around the borders. I've found that it can be a real hassle trying to fit my photos into standard windows due to the fact that the images are captured at a different aspect ratio. So I save myself the headache and go for a custom cut mat. Just keep that in mind through this discussion — mats and windows can be cut to any size you need.
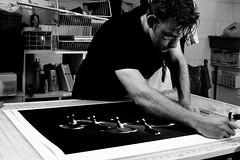
MOUNTING
Mounting a print involves adhering the back of the paper to a board of some type. This keeps the print nice and flat while ensuring that it doesn't move around in the final display. Mounting boards can be things like foam core, poster board, mat board, or (my favorite) Gator board. High quality boards can be quite expensive, but keep in mind that this is a fine art photo and quality is the name of the game. Don't skimp on the mounting board if you go this route.
When mounting (and this goes for matting as well), be certain that you're using a non-acidic and NON-PERMANENT archival quality adhesive. Why non-permanent? Once you adhere the print to something permanently, it will likely lose value in the eyes of some collectors. The actual print is the valuable item here, so it's best to leave the possibility of removal. But, as with any advice in this series, the decision is up to the artist.
MATTING
Matting a print involves placing material on top of the print in the form of a border. This does two things: provides a predefined viewing space for the print, and protection. The mat border can be as large or small as you wish — as long as it looks good with the photo. It also sets the photo back from the top plane of the piece, which keeps the print surface away from other surfaces (like the glass of a frame).
When it comes to mat materials, you basically have your choice of colors. You can also get mats with different colors in the core (usually white if different than the main color of the mat) — this gives the border of the print a little extra complexity and separation. Most mats come in 4 or 8 ply, with 4 being more common and available. The ply just designates how thick the mat is based on how many layers of material are used. Mat windows are commonly cut at a 45 degree bevel to show the depth of the material, but there are other types of cuts available to suit your tastes.
If you want something truly unique and perfectly matched to your particular print, go with a professional framer! These folks have a huge number of mats available to them, and they have the equipment and knowledge for cutting the stuff. Unless you do a huge volume of matting, it's totally worth it to use a professional framer.
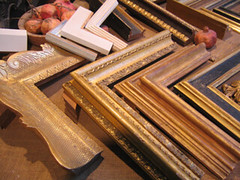
FRAMING
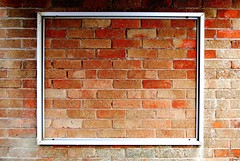
Framing is the really expensive part of the final presentation. A good frame setup will cost far more than the mounting and matting. Framing is also the main part of the piece that needs to match with the surroundings of the display location. Change the frame from wood to metal and you have a totally different artwork. People are generally picky about the framing of their displayed artwork because it needs to match what they already have on the wall.
I generally don't frame my photos unless the recipient explicitly asks for it. Even then, I try to find out exactly what they want so they're not disappointed with the final piece. I'll try to let the buyer do their own mounting, matting, and framing so that shipping costs are lower and so they can present the artwork in a way that suits their own tastes.
And as I said before, use a professional for your framing needs. Don't go buy a cheap plastic frame that happened to be on sale and stick your “fine art” print in it. The quality of the frame will completely diminish the quality of the artwork. Not trying to be snobby about this stuff, but I'm just sayin'!
USE A PROFESSIONAL!
Ok, I know, I said this a few times already. But I have to say it again. Unless you create a large volume of mounted, matted, and/or framed fine art photos, save yourself the trouble and use a professional. PROFESSIONAL is the key word here. A pro will be able to provide you with a top quality product and a top quality experience. You'll pay a few dollars more than a craft store framing service, but it's worth it.
I use Artistic Endeavors here in San Diego, and these guys are REALLY good at what they do. A professional will work with you rather than just for you to produce exactly what you want.
For my personal collection (of other people's works) hanging in my living room, I choose to mount the photos on black Gator board and mat them with a 4-ply black mat and white core cut at a 45 degree bevel. I usually leave a 2-3″ mat border depending on the print size. I hang the prints on the wall without a frame — just the mat and the board cut to the same outside dimensions. It gives me a trendy display at minimal cost.
WHAT'S YOUR EXPERIENCE?
In this section, I've spoken mostly in generalities because we don't have the time or bandwidth to get into the technical details of this topic. But I'd like to hear what the rest of you do for your fine art prints. Do you mount, mat, and/or frame them before sending them off? Do you do it yourself? Do you have experience with a professional framer? And if you collect prints, how do you display them in your own gallery?
FOLLOW THIS SERIES OF ARTICLES!
BACK — SIGNING
NEXT — SHIPPING
Sean Galbraith
June 25, 2009Tip: If you go in to a frame shop and you ask for a quote… walk away if they pull out a big thick industry framing pricing book. You’re about to pay way too much. Find a nice small framing shop that isn’t located in a prestigious area for the best prices.
Mounting or not mounting (permanent or not) is a decision that you as an artist can make. There is nothing inherently wrong with permanently mounting the image (using archival materials – more below) provided that the piece is identified as such (i.e. “Pigment Inkjet Print on board. Signed au reverso” or whathaveyou). Essentially, you as the artist are making the decision as to how you want your piece displayed. Same goes with applying a laminate, or using a resin coating. If you want to frame and not have a matte, you need to mount.
Note that standard gator board isn’t rated archival (though, in practice how much this matters is a subject of debate). They do make a product called Stonehenge Gatorboard that included a layer of archival matte between the
Mounting options generally:
Foamcore: Avoid like the plague. Looks bad. Doesn’t stay flat. Dents by looking at it. Non-archival
Matteboard:Archival, but with the same properties as foamcore (though, doesn’t dent)
Dibond: Really nice metal mounting surface. Really flat, really strong. Expensive. Very clean look. Needs a very experienced shop (I’ve seen many bad dibond mounts). Don’t know about archival qualities.
Glass options:
Standard: Non-UV protective, non archival, highly reflective. Cheap.
UV Glass: The minimum you should use. still highly reflective, but your piece will be protected from sun.
Non-reflective glass: Use with caution. Looks nice from straight on. Not so good from an angle. Slight colour shift. Can’t be used with a shadowbox.
Museum Glass: The gold standard. VERY expensive and difficult to work with (when I use it, it doubles my total framing cost). Very high optical clarity. Minimal colour shift. Non-reflective.
Sean
Charles
June 25, 2009So the tips here are great. Pretty straight forward. The problem I have is that using a professional framer puts the prints out of the price point that most people are willing to pay. Personally it’s totally worth while to have a good frame/matt, but a lot of consumers aren’t that picky, and others just cant afford it. I guess it becomes a matter of marketing after that: to which market could you sell a framed fine print and how do you break into that market. That could be another series for you Brian!
Sean Phillips
June 25, 2009Can you expand on how you attach the print to the mount board. This is where I’m really struggling to find a decent option.
Brian Auer
June 25, 2009Honestly, I just have my framer do it. But from what I understand, you can buy many different types of adhesives such as mounting tapes, sprays, and adhesive sheets. Most art stores will also carry a roller for adhering the print to the mount board — something like a handheld rubber roller that won’t damage the print surface. There’s also dry mounting, which requires a different type of adhesive material and dry mount press equipment that uses heat and pressure to activate the adhesive.
Tom Gurney
June 30, 2009This is a really comprehensive guide. Perhaps you should get a Twitter account, i think you could get more interest in your blog from there.
I think people don’t realise the complexities of framing an art product well, and i think good personal service by someone that knows what they’re doing counts a lot to achieving the best results.
Rob McKinley
July 1, 2009I don’t do it myself. i always go to a professional who know this art perfectly.mounting or framing the prints is very necessary as it gives an outlook to the image, it makes it presentable, and gives a completeness feature to the print. well one should go for mounting or framing or matting depend on the fine art print one has made. With me its like sometimes mounting goes and sometimes i go for framing. Even i very particular about the mount to be use because in my view these all add ups to the beauty so they have to be perfect and according to the fine art print.
Paul Nathan
July 10, 2009I agree with Sean. Mounting or not mounting is a decision that you as an artist can make. There is nothing inherently wrong with permanently mounting the image, but you need to be aware about it, because once you make permanent framing, the permanent glue will make oxygen chemical reactions with the inks and then you might not reverse your mind, I advice you not to use acidic and PERMANENT archival quality adhesive, because this makes the picture board dull as ink makes reactions with those acids.
Thankyou for posting such a beautiful article, waiting for your upcoming post’s