Your Guide to Adobe Bridge: Organizing

In the last part of this series, we went over File Processing with Adobe Bridge. So now that the images have been skimmed and processed on a very basic level, it's now time to start picking out the good ones and organizing.
Before I spend any more time keywording or adding titles and descriptions, I thin out the herd so I'm not wasting time on photos that will never be used for anything. To do this, Adobe Bridge offers several tools such as stars and labels. Bridge also offers tools for finding images, so we'll cover searching and creating collections.
FOLLOW THIS SERIES OF ARTICLES!
VISIT THE TABLE OF CONTENTS
BACK — ADOBE BRIDGE FILE PROCESSING
NEXT — ADOBE BRIDGE USEFUL TIPS AND TRICKS
STAR SYSTEM

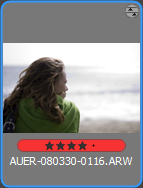
Adobe Bridge offers the ability to star your photos based on a five point scale. This gives you six levels of separation to use however you like. I personally don't use the stars because my own organizing scheme works fine without them, but you may find a use for them. Once you add stars to a photo you'll have the option of filtering your files by this rating system.
I say that I don't use the stars, but I actually utilize them as a temporary means of choosing files. If I have several photos of a very similar scene, I typically want to choose just one of them. So I add stars to photos in the group based on technical and artistic merits. This helps me narrow down my selection to just a few photos that can be compared side by side. After I choose the winner, all the stars are removed.
LABEL SYSTEM
Labels are similar to stars, but they're not so centered around a ranking scale. I use labels heavily because they can be filtered easily and the colors associated with them make it very convenient to spot labeled photos and folders. In addition, the label system can be customized to match your needs. Labels can be applied via the right-click menu or by pressing “Ctrl+(6-9)” while one or more items are selected.

The default labels offered in CS3 are No Label, Select, Second, Approved, Review, and To Do. These may be fine for your particular workflow, but I've customized the text of my labels to make them more recognizable. This can be done through the “Edit >> Preferences… >> Labels” dialog. I use To Do (need to be processed), In Process (started but not finished), Complete (finished processing), Revisit (reprocess later), and For Sale (anything on the market).
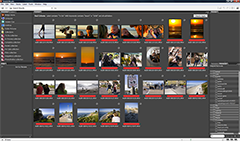
I only apply labels to the photos I'm going to process on a deeper level, so very few of them actually get a label. I also label my folders with red, yellow, or green based on what I have going on inside. Red folders have not been processed at all. Yellow folders have some photos started. Green folders are complete and need no attention at the moment. And Blue folders were complete but need more attention now. So while looking at my folders, it's easy to see what needs working on and what doesn't. Once inside of the folder, it's a simple matter of selecting the “To Do” or “In Process” filter to see what needs work. The filter is also handy for bringing up the completed photos in case I'm looking for new material to sell.
SEARCH FEATURES
Filters are fine if you're working in a single folder of photos, but sometimes you need to expand your reach to a set of folders encompassing multiple photo shoots, months, or years. Finding what you're looking for is no problem if you've done your job with adding keywords, labels, and other metadata.
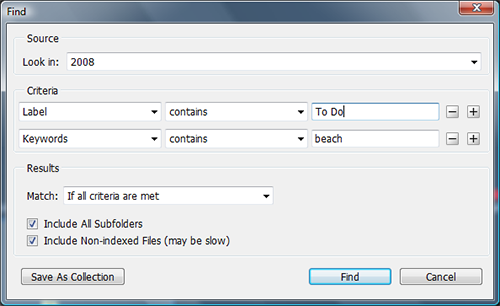
Most of us are familiar with search and find functions commonly found in software. Bridge is no exception, but the tool is much more powerful than most. Before you start your search, be sure to navigate to the location you want to search under (this will make your job easier). To open the “Find Dialog” just press Ctrl+F or find the item under the “Edit” menu. Here's what we see:

The Source option will be pre-filled with your current location, but you can also choose other common locations or browse for a specific directory. Criteria can be added or removed to suit your needs, and there are a vast number of metadata options that can be used for the search. In my example, I'm searching for a “beach” photo that I need “To Do”. There are several other options for the Results that dictate how the search behaves. When you're ready to search, hit the “Find” button.
USING COLLECTIONS
If you find yourself conducting the same search over and over again, a collection is what you need. Collections are like saved searches, but can be carried out from any location with the same criteria. The results are similar to albums in other organization software, but it's not quite a drag-n-drop operation.
For example, I'd like to be able to find all of my “To Do” photos without having to look in each folder and filter things down. By creating a collection with the criteria for the label “To Do”, I can run the collection for a set of photo shoots, an entire year, or the whole archive. You can also create collections to search for specific keywords or other items in the metadata.
To start a collection, follow the instructions for a regular search. But instead of hitting “Find” we're going to hit “Save As Collection”, which will bring up a save file dialog box. Choose a location for your collection, give it a name, and save it — I store mine in a top level directory called “Collections” within my photo archive. Also in that save dialog, you'll see a couple of other options down near the bottom. I typically select the “Start Search From Current Folder” option so I can execute the collection from any location.

To run a collection search from any directory, you'll need to also add that collection to your “Favorites” so you can access it while browsing your folders. When you get to the level that you want to search from, just run the collection by double clicking it and the search will begin from your current location. Some collections I've put together include one for each of my labels and one for seeking images that I've posted on various websites (I keyword them with things like “Flickr” and “ImageKind” after I've posted them online).
Features such as searches and collections only work well when you've put the effort into your photos up-front. Keywording, labeling, starring, and adding other metadata is a key process that has substantial benefits down the road.
WHAT'S NEXT?
I'm sure we could drag this thing out for many more weeks, but I think we've covered a majority of the key points with the software. In the next part of the series, I'll talk about various tips, tools, and techniques for using Adobe Bridge efficiently and effectively.
FOLLOW THIS SERIES OF ARTICLES!
VISIT THE TABLE OF CONTENTS
BACK — ADOBE BRIDGE FILE PROCESSING
NEXT — ADOBE BRIDGE USEFUL TIPS AND TRICKS
Here’s a video I found that goes well with the content discussed in this article.

April
April 26, 2008Great tips in this article — thanks!
AntY
February 17, 2010The video link seems to be dead.