Your Guide to Adobe Bridge: Workspace

In the last post of this series we talked about the basics of Adobe Bridge. What it is, what it can do, why it's a good thing, and some of the computer requirements. I'm sure some of you are quite anxious to start digging in to the finer details of the software, but before we go anywhere I want to talk about the Bridge Workspace.
A workspace refers to the layout of features and controls available in a piece of software. Adobe Bridge has several predefined workspaces, each having a unique purpose in the photo management process. Different workspaces mean different views, panels, and controls. I'll lay out the various workspaces, then we'll dig into each of their components (many of which are shared across workspaces).
FOLLOW THIS SERIES OF ARTICLES!
VISIT THE TABLE OF CONTENTS
BACK — ADOBE BRIDGE INTRODUCTIONS
NEXT — ADOBE BRIDGE IMPORTING
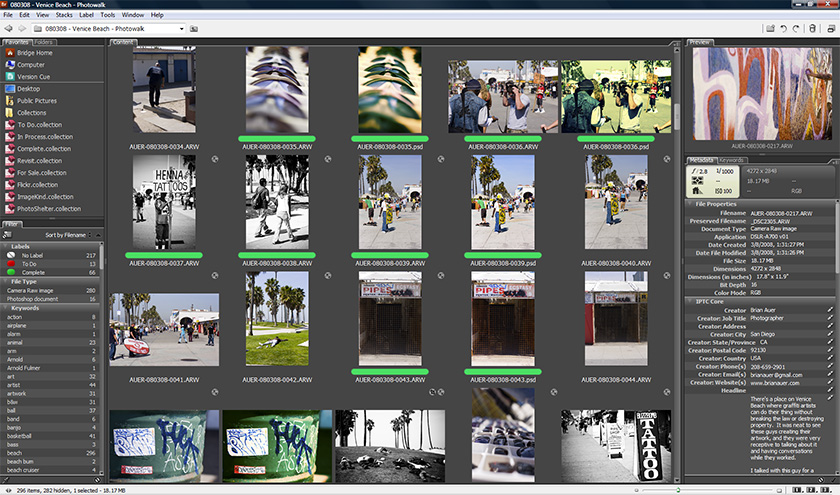
THE SIX WORKSPACES OF BRIDGE
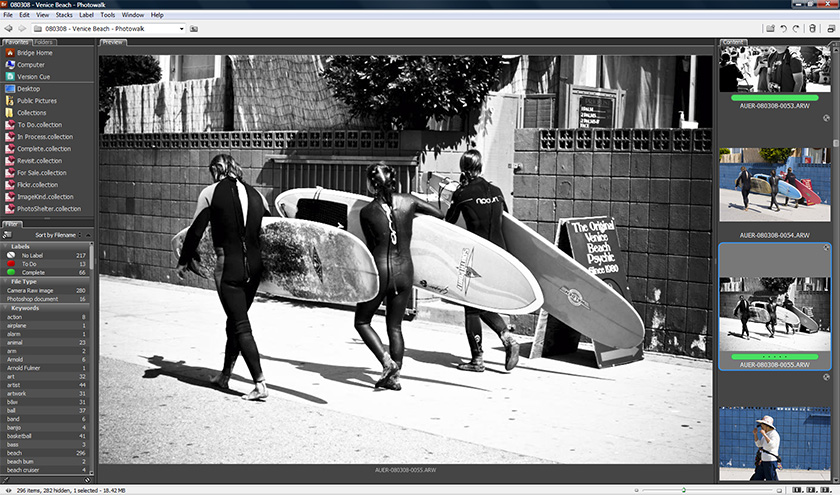
Adobe Bridge has six predefined workspaces. You can also create your own space and save it if you find something that works better for you.

And here are a couple of my own custom workspaces. They're only slightly different than the predefined workspaces, but sometimes those little things can make a difference in your productivity. I'd encourage you to make your own workspace by dragging the various panels around until you find something you like.

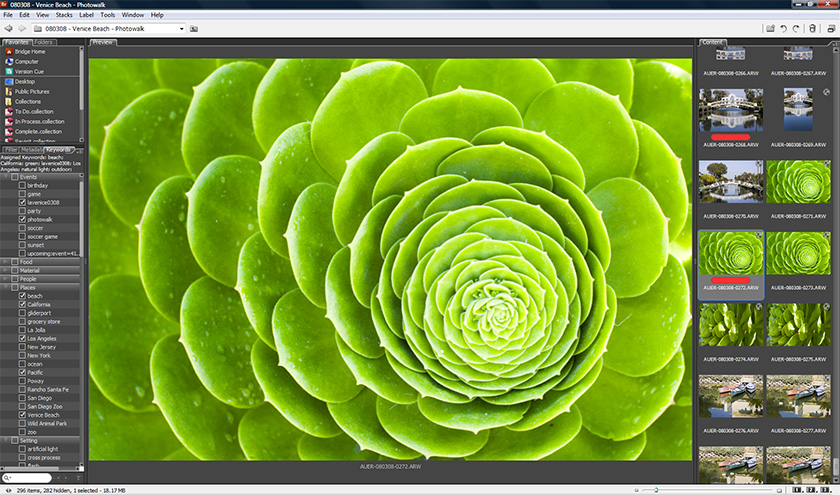
After looking at a few of these workspaces, you ought to notice that they consist of the same parts (aka “panels”) but rearranged. So let's dig into those panels and explore what they do.
THE SEVEN PANELS OF BRIDGE
For the purpose of this section, I'm using a screenshot of a workspace that has all seven panels visible. I don't usually work with such a layout since tabbed panels are more space efficient. Refer to the colors in the image as I step through each of the panels.
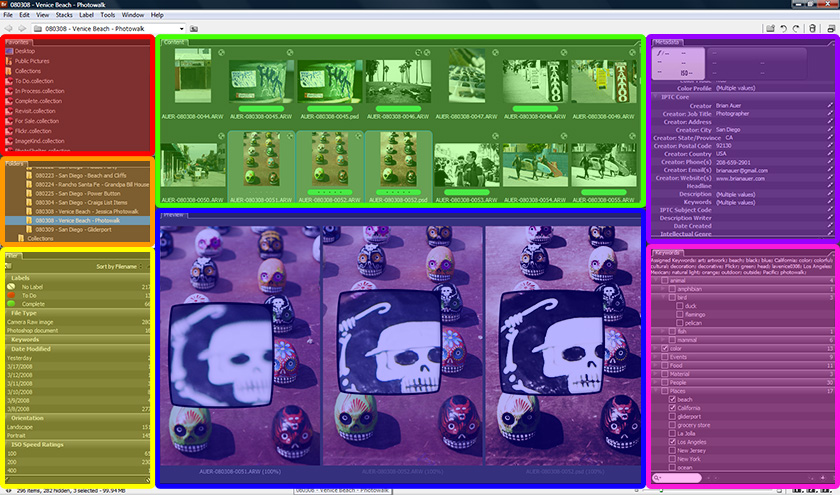
- FAVORITES
Similar to a “Favorites” or “Bookmarks” folder on a web browser, you can keep your most helpful items in here. Favorites can include folder locations, files, collections, previous searches, Version Cue, Adobe Stock Photos, downloaded comps, Bridge Home, and a bunch of other stuff that can be set in the general preferences (Edit >> Preferences… >> General). Personally, I find it handy to keep my most used collections in there (we'll get to what those are another day). - FOLDERS
If you've ever browsed a directory tree, this one should look familiar — It's just your folder structure on your hard drive. Folders can also be navigated in the “Content” panel, but the “Folders” panel provides a quick method of changing locations. - FILTER
I love this panel. I think it's one of the best things in Bridge that sets it apart from other software. Filters are a way to exclusively view photos that meet a specified criteria. Want to see only your RAW files? Or how about images with a certain keyword? Maybe you're looking for an image with a vertical orientation? Easy — just click on the filter and you'll only see those images. If you sort-of know what you're looking for, filters will allow you to find it a hundred times faster than scrolling through tons of images. - CONTENT
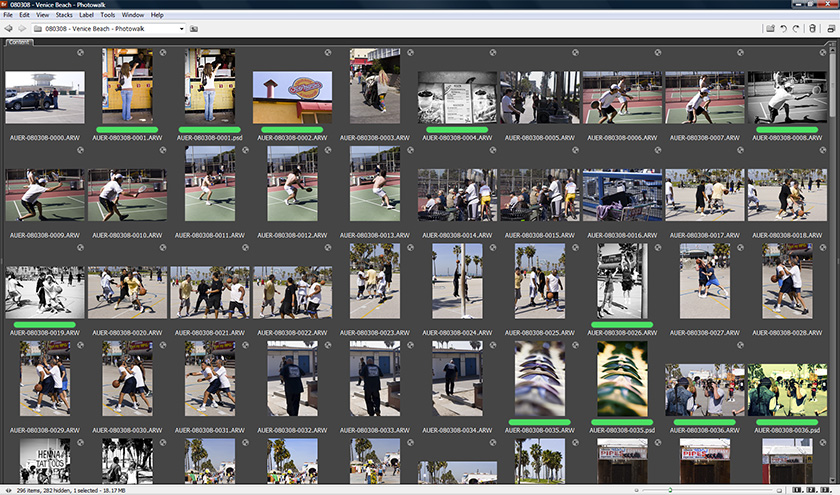
The content panel is a window to the contents of your current folder, not unlike a file browser on your OS. But the content panel provides more functionality than your operating system can. Thumbnails can be resized from very tiny to very large, and they can be set to scroll horizontally or vertically. Bridge caches the thumbnails for super-speedy viewing. Thumbnails also show star ratings (which I don't typically use), labels (which I definitely do use), filename, and a few other things depending on what the photo is and what's been done to it. This panel also allows you to access a large number of controls and commands via the right-click menu. - PREVIEW
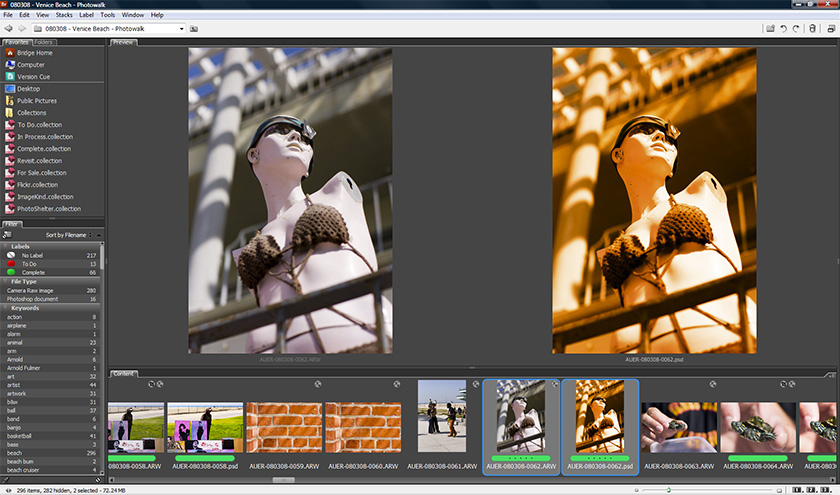
The preview panel is similar to a slideshow, but a little more powerful. It's very handy for inspecting images at larger scales, comparing multiple images side-by-side (just select multiple files in the content panel), checking for sharpness and whatnot between 100% and 800% zoom (click on the image and a magnifying loupe pops up – scroll to change the zoom). The other great thing about using this preview is that everything is color manged, so your Photoshop files and RAW files will appear EXACTLY the same as in Photoshop. - METADATA
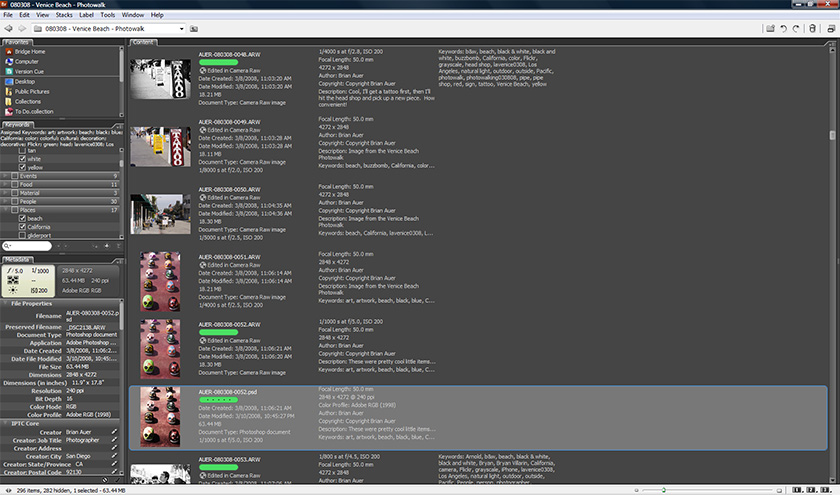
When I first import photos this is where I spend most of my time. The metadata panel provides you with access to all the file info, EXIF, IPTC, RAW settings, and a bunch of other stuff you never knew existed. What's really great is that you can select a bunch of images and apply keywords, descriptions, copyright info, location info, and other things as a batch. - KEYWORDS
The keywords panel is similar to the metadata panel, but it's sole purpose in life is to organize and apply keywords. Common keywords can be grouped, categorized, applied in batches, and renamed with this visual interface. Keeping your keywords organized and up to date can prove to be a major benefit while keywording images — I'm alway amazed at how many more keywords I can apply by just taking a quick scan through my lists.
So that's pretty much it for the panels. I touched on a couple of usage tips and tricks, but we'll go much deeper in subsequent articles.
THE MANY CONTROLS OF BRIDGE
To prevent this article from getting too long, I'm not going to visually highlight all of the little buttons and menus as I did with the panels. I would encourage you to explore the software interface on your own, looking for the little icons located below the menu and at the bottom of the window. Some of the panels also have buttons and drop-down menus that provide added functionality. Right-click menus contain another wealth of options to assist you with organizing, searching, and processing your images.
One major item worth mentioning is the “saved workspace” button set. Look down at the lower right of the window — you should see a “1”, “2”, and “3”. Hold down on one of them and select a preset (or custom saved) workspace. Set all three for the ones you like the most and now you have a workspace quick-launch — hit the button and away you go!
WHAT'S NEXT?
At this point I think we're quite familiar with the Adobe Bridge interface basics. From here out I'll be walking through my typical workflow and highlighting all of the things I commonly use the software for. In the next article we'll talk about importing photos from your camera or card reader straight into Bridge. This is a very important step, since it can save you lots of time once you get those file on your computer. So stay tuned!
For those of you looking to obtain Adobe Bridge: Claudius Coenen mentioned on the last post in this series that there is a way to get Bridge for free. Apparently if you download the Photoshop CS3 30-day trial, the license will expire on Photoshop but not on Bridge. Now of course one of the major benefits of working with Bridge is the ability to interface with Photoshop and ACR, but it's also handy as a standalone file management tool. Also note that I haven't tried this out so I can't say that it works for sure.
FOLLOW THIS SERIES OF ARTICLES!
VISIT THE TABLE OF CONTENTS
BACK — ADOBE BRIDGE INTRODUCTIONS
NEXT — ADOBE BRIDGE IMPORTING
Here’s a video I found that goes well with the content discussed in this article.
ozlady
March 21, 2008Brian – a big thank you for introducing this great piece of software that I didn’t even know I had when I purchased Photoshop! I’m in organisation mode and this really floats my boat! Awesome and I look forward to more in the series – thanks!
Gowri
March 21, 2008Hi Brian,
Thanks so much for the post. I wasn’t initially very comfortable with the default workspace, which is why I ignored Bridge for so long, I guess. But the idea that I can customise my workspace has excited me. Thanks for all the tips!
Cheers,
Gowri.
Claudius Coenen
March 21, 2008Thanks for the link!
Ryan G
March 23, 2008this is great brian. Definitely going to become a go-to resource for bridge online.
nice work!!!
kathleen kephart
January 3, 2009Brian; I have CS3 software that was given to me but the owership has not been transferred to my name . Therefore I am unable to get tech support from Adobe.
My problem is the inablility to see pictures in tthe preview panel. I have checked the edit function and searched under preferences with out any change in the preview panel. Any thoughts you might have would be appreciated.
Kathleen