Photoshop Technique: LAB Sharpening
Sharpening is something that almost any image can benefit from. Like saturation, it can easily be ignored or overdone if you're not careful. When done right, it's a subtle change that results in a big improvement.
!!! For the sake of presentation and comparison, the images shown in this post are highly exaggerated examples of sharpening. These images are NOT good examples of proper sharpening. At the very end of the article, I've shown the true sharpened photo in comparison with the original !!!
It seems that there are many ways to sharpen a photo, and the most common is Photoshop's Unsharp Mask. It's a fine tool for most cases, but it can produce terrible results when used incorrectly or without caution. I, myself, usually fall back on the Unsharp mask for a majority of my sharpening needs. But using this tool in the RGB color space is not ideal!
Recently I posted an article about a LAB Saturation Photoshop Technique — and this article is much the same, but with a focus on Sharpening. LAB (Lightness, A, B) color mode is a great way to increase the quality of a tool such as the Unsharp Mask or other sharpening methods. So open up a photo that could use some sharpening and follow allong!
Just like with the saturation article, I've put together a Photoshop Action that will assist you in speeding up the process of LAB Sharpening. I've been using this action for the last several months and I can honestly say that I've been using it with every photo that requires sharpening. As with the saturation action, you simply select the top layer, run the action, choose your Unsharp Mask settings, and when presented with a location to duplicate to, just choose your original file. And before running the action, read through the steps below to get a better idea of what it's doing.
1. OPEN YOUR IMAGE AND DO YOUR STUFF
The RGB color mode is the most common to work with, so I’ll assume that most of us use this as our default. We can still work in RGB even though we’re doing adjustments in LAB color mode — it’s just a little extra work. So open up your image as you normally would and basically process the entire image until you're happy with it.
Sharpening should occur as the very last step in your workflow for two main reasons: 1) It's a very localized adjustment of brightness and any further processing will exaggerate it beyond your original intent, and 2) It's a destructive process, so we'll be using a copy layer for the sharpening — and if you stack adjustments on top of those layers, it makes life very difficult if you choose to go back and rework the sharpening.
2. OPEN A COPY IN LAB MODE
Make a copy of the visible image by doing a “Stamp Visible” command (Ctrl+Alt+Shift+E). This gives us a single layer that contains all of the underlying adjustments we’ve applied. Now take this layer and duplicate it to a new document. Once in that new document, change the color mode to “LAB”. Why not just change the color mode in the original file? You’ll lose any RGB-specific adjustment layers such as the curves adjustment we just applied (go ahead, try it and see what happens). OK, so now we’re working with LAB and we’re ready to sharpen that photo.
3. SHARPEN THE LIGHTNESS CHANNEL
The lightness channel contains all of the light and dark tones in the image while avoiding any noise caused by the color channels. Sharpening works by darkening the darks and lightening the lights at their boundaries. Any color noise will cause noisy sharpening, so we'll just avoid it altogether. In this example, I'll use the Unsharp Mask to sharpen the image. In truth, you could use whatever method you prefer in place of that — the key is to do it on the lightness channel.
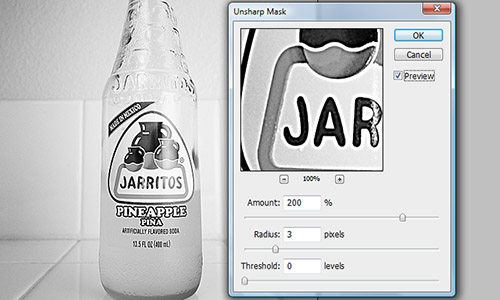
So switch to the channels palette and select “Lightness”. The “A” and “B” channels should be deselected and your image should look like a black and white photo. Now, apply your sharpening directly to that channel. For the Unsharp Mask, you can find it under Filter >> Sharpen >> Unsharp Mask. I typically start with an amount of 100%, a radius of 1.5%, and a threshold of 1 — but every image requires different settings, so don't just assume that those numbers are the best. Once you get the sharpness where you like it, apply the filter and reselect the “LAB” channel in your palette.
4. COPY BACK TO THE RGB IMAGE
Now go back to your layers palette and copy that layer back to your original image — it should convert itself back into RGB when you copy it over.
Once you’re back in the original image, you’re pretty much done with the adjustment. You can now toy around with masking and opacity settings to get the final look you’re after. Sometimes I'll over-sharpen the sharpest areas just a bit then go back and partially mask out those areas that didn't need much sharpening. This allows me to properly sharpen the majority of the image.
A COMPARISON OF THE RESULTS
Now for the fun part — let’s evaluate just how much better this technique is from an RGB image that's been sharpened with the Unsharp Mask. Sometimes the old RGB method will work out better for you, but in my opinion, the LAB sharpening is much more natural with fewer halos and color oddities.
You folks reading this on the feed will have to pop over to the site in order to see these mouse-over effects.
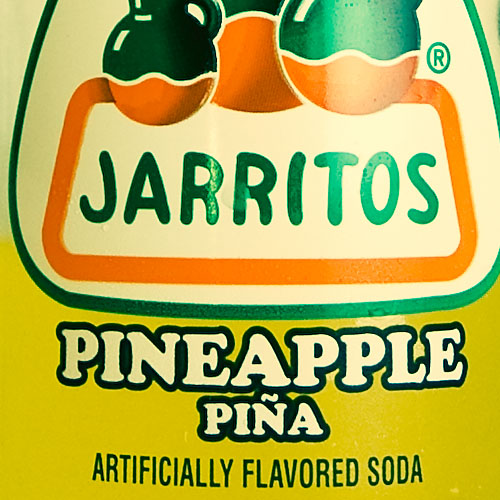
LAB Sharpened (shown), RGB Sharpened (mouse-over)
Each of these were sharpened at 200%, 3 pixels, and a threshold of 0.
See the white halos, discoloration, and over-saturation on the RGB version? This is why LAB is the way to go.

LAB Sharpened (shown), Unsharpened (mouse-over)
RGB Sharpened (shown), Unsharpened (mouse-over)

True LAB Sharpened (shown), Unsharpened (mouse-over)
This one was done at 65%, 1 pixel, and a threshold of 1.
Niels Henriksen
February 8, 2008The LAB colour space provides many opportunities such as the one Brian as highlighted with the sharpening technique. It also provides opportunities to enhance colour in a way that RGB cannot.
The 2 colour channels in LAB, A (red-green pair) and the B (blue-Yellow pair) allow you to provide more separation between these pairs which is not possible in RGB mode.
Even CMYK mode has it on benefits, some limited, because you can influence ink lay down.
For those who are not comfortable with going into LAB, which is really quite easy as Brian has pointed out, can get the same results by performing the sharpening in RGB and then before you do anything else use (Edit – Fade and change mode to luminosity)
Also if you find that you need to be more aggressive in the mid-range tones, which will cause some blown highlight edges, you can under the layer st7yle use the blend-if sliders to remove any blown highlights.
On my web site I have a PDF document (3.2M) with an article “Blend-If Slider to Control “Halo Effect
https://nielsp.ca/Ariticles.htm
For those of you who want to learn about LAB form a great photographers who publishes monthly in Photoshop magazine, then get the “Photoshop LAB Colour (the canyon Conundrum”
I have and love this book and I worked through all the exercises and now I ahe a new set of tools that were not available in RGB
Maybe Brian can provide an affiliate link to Amazon for those who wish to buy it and at the same time we can show our support for all the effort that Brain undertakes to keep this community going.
Niels Henriksen
Jim Goldstein
February 8, 2008Nice write up Brian. I’m looking forward to seeing the mouseover comparisons when I arrive home this evening ( they don’t work on my iPhone ). LAB does provide a lot of opportunities for those that take the time to learn it. One thing to note is different sharpening settings (%, pixel & threshhold) work better for different display types. Something your readers will likely want to be conscious of.
Jay Dismas
February 8, 2008I tried the Sharpening and Saturation actions. When it gets to the “Select layer LAB Sharpen” or “LAB Saturation” I am notified that the layer “LAB Sharpen” or “Saturation” is not available.
Without that the job doesn’t get done, I believe. Can we correct that? Am I doing something wrong or missing something?
Brian Auer
February 8, 2008Jay, one thing you have to make sure of is that you’re placing the layer back into the original RGB image that you started with via that duplicate layer dialog box. If you do that, the name of the layer should be “LAB Sharpen” or “LAB Saturation”. If it’s not changing it’s name to that in the duplicate layer dialog, you can do it yourself. You can also deactivate or delete that step in the process since it’s not critical for the operation to work.
AlaskaTeacher
February 8, 2008I just discovered lab sharpening thanks to a Lomo tutorial on one of your Delicious reads. Thanks for the write up! I look forward to using it!
willi
February 8, 2008thanks for this article. great help! i must say, i have always committed the mistakes you have mentioned. thanks for your lessons!
Max Bian
February 10, 2008Nice writeup on this topic.
The difference between LAB sharpened and RGB sharpened is very difficult to see from the fist set of mouse-over examples. Subsequent examples showed both techniques can produce halos, which is simply result of improper radius setting.
Another interesting sharpening technique is high-pass. It does not offer the wide range of control like USM but it is quite effective in many cases without increasing noise.
Max
Brian Auer
February 10, 2008The differences can be hard to see, but the major difference is the fact that LAB preserves the original colors more properly than the RGB version does. As I mentioned in the article, the examples were extremely oversharpened to show the effects and differences.
High pass sharpening can be great for certain types of photos. Those with higher contrast boundaries tend to produce better results with that method.
Sakari Mäkelä
February 10, 2008Hey!
Excellent article about Lab-sharpening , very interesting! Thanks! Just one thing I wonder – of course could try out myself and see, but what do you think…. Is there any difference, if I do the USM in RGB mode and then select FADE, leave it 100% but change the mode to luminosity?
All the best ‘
Sakari Mäkelä
Siuntio, Finland
Brian Auer
February 10, 2008Setting the sharpen layer to luminosity definitely helps to avoid some of those strange color halos, but you might still get some artifacts from the color information in the R, G, and B layers. I’d be curious to hear your results in experimenting with this.
Andrew V.
October 7, 2008In the action created in the download its deletes the layer and then the sharpening is gone. why is that?
Brian Auer
October 7, 2008In the action created in the download its deletes the layer and then the sharpening is gone. why is that?
Sarah Bolopski
February 6, 2009You have to resharpen the image after you create it. Chances are, you are selecting the original image when you choose an export location.
Richard Butler
July 7, 2009Lab sharpening is a very useful strategy – however its not always published that when you convert to Lab and back from RGB you experience pixel loss – and this can be measured using histogram bin counts. Another useful way in RGB is to create duplicate layers, desaturate and blend using Luminosity. Its not the ‘be all/ end all’ but its pretty useful. For skin tones another way is to consider sharpening the Black (K) in CMYK and converting back. Dan Margulis explains this in detail.