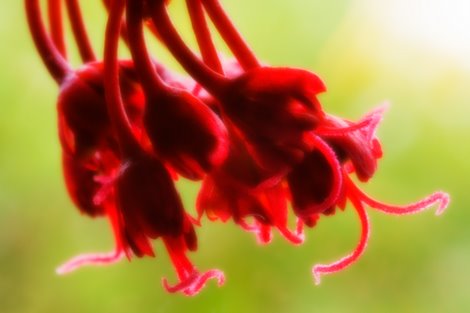
Red Tree Blooms
I've shown this photo before in an earlier post titled “Indoor Macro Photography Project For Rainy Days.” In that post, I walk through the method I used to capture this particular photo. The reason I took this photo was because it was small, I liked the color, and I thought the little curly-bobs would make for a neat photo.

The JPEG (1) was pretty off in white balance (too cool), so I warmed it up and brought up the saturation by processing the RAW file (2). There was some extra subject matter in the frame, so I cleaned it up with some cloning (3). I applied a curves adjustment layer (4) to bring the highlights up and the shadows down ever so slightly. Now for the fun part. I used the “Stamp Visible” command (Ctrl+Alt+Shift+E) to make a copy of the visible output into it's own new layer. Then I took that layer and copied it again. The one on the bottom got a Gaussian blur (5) applied to it at maybe 10 to 15 pixels — I forgot exactly what I did. Then I changed the blend mode (6) of the one on top to “Overlay” at 100% opacity and 67% fill.
The last two steps did two things: increased contrast/color, and added a soft glow while maintaining sharpness of the bigger features. You can get some pretty interesting results when you start playing around with blurs and blends.
** You can also see this photo on Zooomr and Flickr **
Photo by Brian Auer
04/01/07 Flemington, NJ
Red Tree Blooms
Konica Minolta Maxxum 7D
Sigma MACRO 105mm f/2.8 EX DG
Kenko 25mm Extension Tube
158mm equiv * f/32 * 30s * ISO100