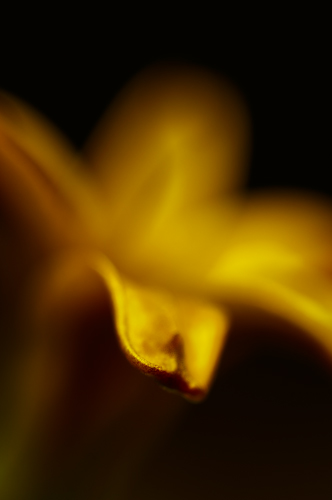
Golden Hyacinth
Here's another photo of the purple hyacinth flowers in my backyard, but now they've opened up a little since the last time I shot them. I took this photo with the intent of leaving most of the subject blurry, so I shot at f/2.8 — wide open on my macro lens. I focused (by moving the camera) to leave only the tip of the closest petal sharp. I framed it vertical because the flower was pointing upward, and I intentionally cut off parts of the flower from both sides because it looked better to me that way. The only thing I wish I would have done differently is place the subject a little higher in the frame — but it's not completely terrible now.
The editing on this photo was part intentional and part accidental (I'll get to that). The JPEG image (1) turned out okay, but you can see that the white balance is a little warm and the dynamic range is not wide enough for this photo — the highlights and shadows are both clipped a little bit. You can see from the RAW conversion (2) in Adobe's ACR that I managed to save the highlights and fix the colors. The bright spots on the nearest petal was a little too bright for me, so I painted in some color (3) on an additional layer to dull it down a little bit and prevent it from being distracting. Then the whole image got a curves adjustment layer in Photoshop CS3 to darken it (4) — I tried going bright, contrasty, dark, and I liked the dark photo the best. The next layer was a slight dodging (5) done with a curves adjustment layer and a mask, followed by a slight burning (6) with another curves adjustment layer and a mask. The mask on these adjustment layers started off completely black, and I used a soft brush with 5% opacity to paint in some white on the mask. The next step is where the accident happened. I opened up the channels palette to turn a layer mask visible (to check on something), and I accidentally turned off the blue channel instead. The while image went from purple to gold! I actually liked it, so I decided to apply this effect to the photo. To turn off the blue channel (7), I applied a channel mixer adjustment layer, I went into the blue channel output, and I pulled the blue slider from 100% to 0%. Presto! Then I went back and did a few touch-ups to my burning and dodging adjustment layer masks. The last step was a targeted sharpening (8) with the unsharp mask on a copy of the merged layer output. I masked the sharpened layer and painted in the sharpness just on the tip of the closest petal. Done!
Photo by Brian Auer
04/14/07 Flemington, NJ
Golden Hyacinth
Konica Minolta Maxxum 7D
Sigma MACRO 105mm f/2.8 EX DG
158mm equiv * f/2.8 * 1/30s * ISO100


Christopher Scholl
May 18, 2007I agree the image would have been slightly better higher in the frame. But it’s still nice.