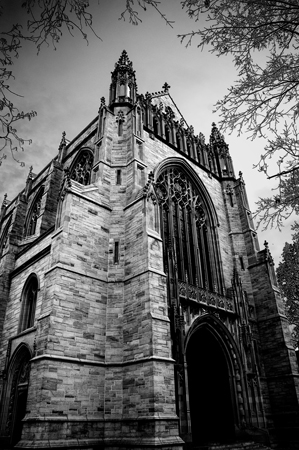
Dark Architecture
This was another building from my last trip to the Princeton Campus here in New Jersey. My Dad and I were doing a little exploring last time he was out for a visit. Some of the buildings there are really something to look at. It's hard to believe that they use these buildings on a regular basis. This one had kind of a stout feeling to it because of the general size of the building. I made it look even bigger by shooting at 18mm with my 18-200mm lens. It has barrel distortion at the low end so it causes the buildings verticals to converge from the perspective I was shooting at. Some people will say that's unprofessional, but I think it adds character is certain cases. I framed the shot with the branches from nearby trees, trying not to let them overlap too much of the building.
The JPEG (1) on this looked okay, but the overall colors of the building and sky were just too bland for me. When I processed the RAW file (2), I actually kept the color saturation down because I knew I would be converting to black & white and I didn't want to introduce any additional color noise or artifacts. To convert to black and white (3), I used the Photoshop CS2 channel mixer at 0% red, 0% green, and 100% blue — basically just the blue channel. Then I had to create a mask to separate the sky from the building and branches so I could adjust each separately. Once I had my mask I applied it to a levels adjustment layer for the building (4) and boosted the contrast by bringing the white point down to 137 and bringing the black point up to 55, which clipped some of the shadows. I used the same mask to apply a curves adjustment layer to the building (5) with a moderate “S” curve to separate the tones a little better. The building was looking pretty good, so I went to work on the sky. I inverted the layer mask from the previous steps and applied it to a levels adjustment (6) in which I brought the black point up to 223 and I left the white at 255. There was almost no detail left in the sky, but I managed to pull a little bit of a gradient out of it. I wanted to add a little more darkness to it so I added a layer of vignetting (7). The last step was a tiny amount of sharpening (8).
** You can also see this photo on Zooomr and Flickr **
Photo by Brian Auer
11/07/06 Princeton, NJ
Dark Architecture
Konica Minolta Maxxum 7D
Konica Minolta AF DT 18-200
27mm equiv * f/9.5 * 1/125s * ISO100


Lee
April 16, 2007Hi Brian,
I really enjoy your blog, especially entries such as this one that show the steps you use to post-process some of your images.
I’ve got a question which I’m aware is quite elementary Photoshop, but it’s the type of thing I stumble over: in a picture such as this, what technique do you actually use to create your layer mask that separates the sky from the building and branches?
I’m somewhat further along on the photography curve then on the photoshop curve (if you can separate the two!), so it’s small details like this that sometimes keep me from getting where I want to go. Any tips are greatly appreciated!
thanks,
Lee
Brian Auer
April 16, 2007Thanks Lee, I’m glad you enjoy these posts. Good question on the masking technique, I’m sure you’re not the only one thinking it. It’s actually not the easiest thing to do in Photoshop, but there are some tools to help the process. I’d tell you what they are, but it’s a secret. Just kidding with you. I’ll write up a post in the next couple of days that shows a few techniques for creating layer masks using the photo itself — as I did with this one. Thanks for the question, I’m sure there are a few others out there thinking the same.
Dave Yuhas
June 23, 2008Brian-
Nice shot. But barrel distortion has nothing to do with converging verticals. Any lens tilted up at a tall object will cause the effect. The only solution is to move back, use a wider lens or use a view camera.