Graffiti Photography: Photoshop Technique
So I've been processing some of my graffiti photos lately, and I thought it might be fun to share my Photoshop process on one of them. The details for each step aren't important because they're specific to this particular image, so take what you want from this. My main point is that photo editing can consist of many small steps, each step nudging you closer to the final image. Some of these steps may appear very insignificant, but they all contribute to the final work.
I went into this photo with the notion of exploiting the colors from the graffiti. I wanted it to look colorful, yet harsh, at the same time. So my two main goals for this photo were color and depth of tone. I also wasn't going to hold myself back from doing some extreme adjustments, even if it gave the photo an “unrealistic” look. Usually my editing process is swayed by my mood at the time. So here's the mood I was in today:
Here is the RAW file processed using the in-camera settings. You can see that it's very dull and dark.
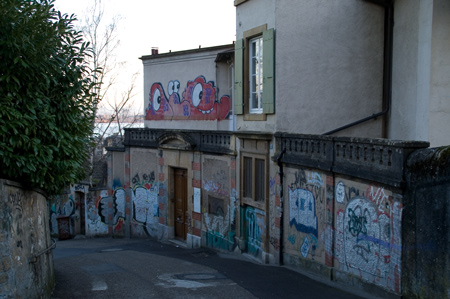
This is the RAW file processed using the “auto” settings in Adobe Camera RAW. The colors are a little better in this one, so I'll use it as my starting point.
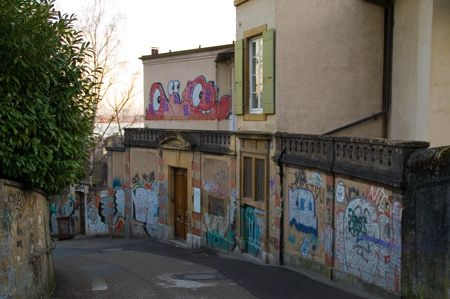
The first thing I did was apply a Levels adjustment layer to brighten up the image a bit. I also masked out the tree branches agains the sky so I didn't lose detail in that area.
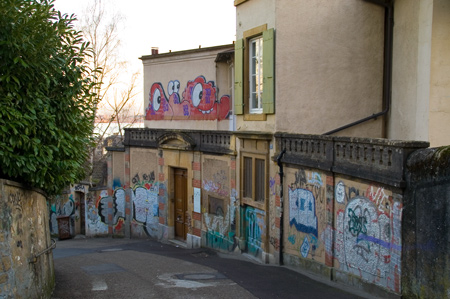
The next thing I did was apply a Curves adjustment layer to further brighten up the highlights and midtones while darkening the shadows a bit for more contrast. Here again, I masked the tree branches against the sky to retain detal.
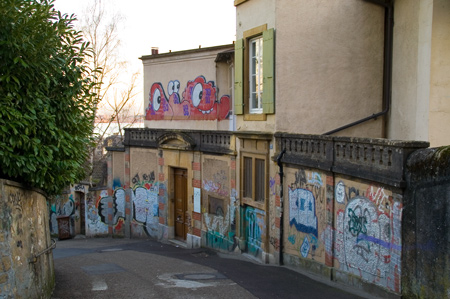
Then I created a new layer on top of the stack and merged all the layers below into that layer. I set the blend mode to Hard Mix with an opacity of 49% and a fill of 48%. I also masked out the tree branches against the sky in order to retain their detail. This gave me stonger colors and more contrast.
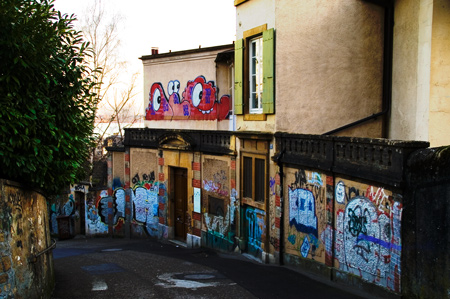
I created another Curves adjustment layer and applied it only to the first story wall in order to brighten it up a bit and get it closer to the second story walls.
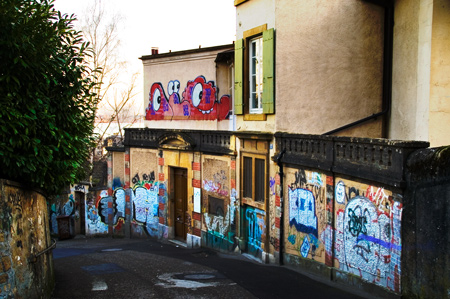
Then another Curves adjustment layer to brighten the entire image just a tiny bit.
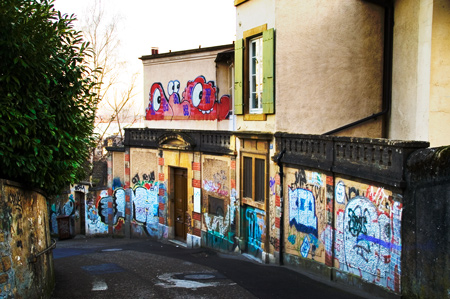
Just as before, I created a new layer on the top of the stack and merged all the layers below into it. I set the blend mode to Color Burn with an opacity of 25% and a fill of 21%. This gave the photo a little more contrast and color depth.
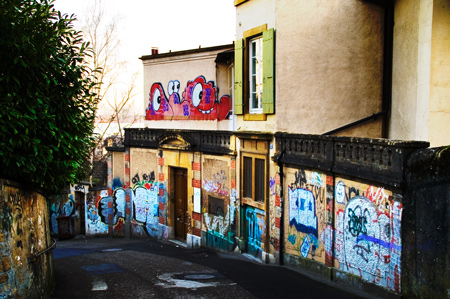
Then another Curves adjustment layer to brighten the image back up slightly.
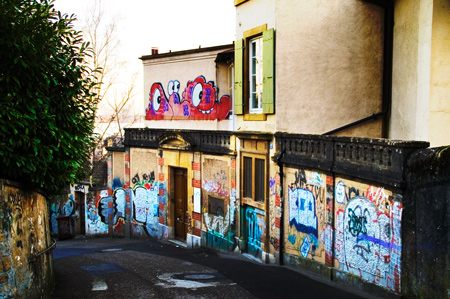
Then another Curves adjustment layer to darken the branches against the sky. I masked out the entire image and painted a hole in the mask just over the branches.
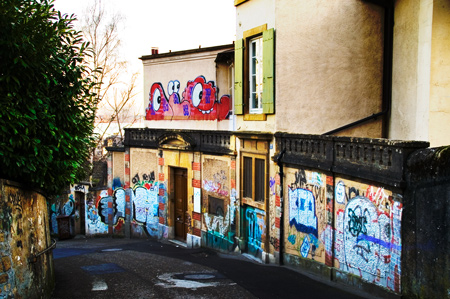
The final step was to sharpen the image by creating a new layer on top of the stack and merging all the layers below into it. Then I applied the Unsharp Mask to this layer. And we're done!
For more interesting photoshop techniques, see my article titled “Warning: These 9 Photoshop Techniques May Result in Great Photos“.
Photo by Brian Auer
03/05/07 Neuchatel, Switzerland
Monsters Out My Window Graffiti
Konica Minolta Maxxum 7D
Konica Minolta AF DT 18-200
44mm equiv * f/4.5 * 1/30s * ISO100
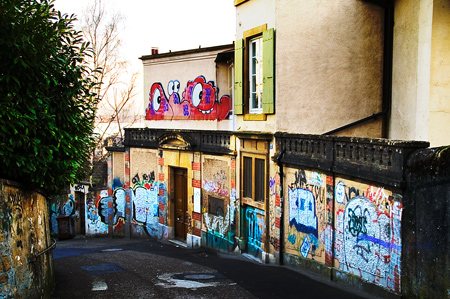
inspirationbit
March 11, 2007That’s a pretty amazing before&after work.
Can you, please, explain more on “This is the RAW file processed using the “auto†settings in Adobe Camera RAW.” How to get to Adobe Camera RAW settings? Is it a part of the Photoshop menu?
inspirationbit
March 11, 2007tanks for such a detailed reply, Brian. Since I don’t have a DSLR yet, I’ve never shot in a RAW format, my Canon p&s camera produces only JPGs. I’m using Photoshop CS, and I think it doesn’t come with ACR. I just read about it on Adobe site, it says that The Photoshop Camera Raw plug-in was released in February 2003.
What can I use as a substitute for that in my PS CS to get the white balance right?
Brian Auer
March 11, 2007Adobe Camera RAW is a piece of software included with Photoshop that is used for processing RAW files. It has all kinds of settings for things like white balance, tint, sharpness, contrast, curves, saturation, lens corrections, etc. Basically, it has about 50 times the processing capabilities that your camera has. You have to process RAW files through this (or some other) software since a RAW file isn’t really a usable image by itself — it’s just the raw data with no corrections or compression.
You get to ACR by opening any RAW file with Photoshop — it has to be processed by ACR before Photoshop can do anything with it. I know in Photoshop CS3, you can open any image file (including JPEGs) in the Camera RAW dialog using Photoshop’s “Open As” command. But I’m not sure about previous versions — never tried.
When I said “Auto” settings, I just mean that there’s an option to let the software pick values for the basic adjustments rather than manually adjusting each value. I usually don’t worry too much about the settings (except for white balance) because I do most of the editing in Photoshop with the adjustment layers.
This is probably all Greek unless you have a camera that produces RAW files or you’ve used the ACR software before. Really though, it’s probably one of the less important steps when you’re going to make drastic changes to a photo anyways — the white balance is important to get right though.
Brian Auer
March 11, 2007Well… You’ve just given me a great idea for tomorrow’s topic.
JAW
March 20, 2007Respect,
Thank you for the detailed processing pointers. I’m not a graff artist, but I’m highly influenced by graff so I’m not certain what label would apply as far as graff, but thank you regardless.
Respect,
JAW
Geebo
March 20, 2007WOW!! I’ve just stumbled across this site, and your manipulation of the photo is brilliant. I’ll need to brush up on my Photoshop skills to fix up some of my old photos, but I think it’s gonna take a while…
and that’s what really got me… I live in London, but stuidied in Neuchatel for 6 months in 1995-1996. I have some great old photos from round the same spot (isn’t that by the Maison des Jeunes?!) and all over Neuch. I can try and scan some of them in (sadly all old aps films) and send them to you if you’re interested. Let me know if you are.
anyway, I’m well impressed and will be keeping an eye on your site!
Brian Auer
March 20, 2007JAW — I can definitely see the influence in your work. Brilliant stuff! Is that all done completely digital? I envy your skills. It’s one thing to take a photo of other people’s artwork and turn it into a new piece, but it takes a whole other level to create the original art. Nice work, and thanks for the comment.
Geebo — Thanks for the compliments. Sometimes you just gotta go with the flow when editing photos and see what happens. As for the Neuchatel shots, I’m not sure exactly which area it was in. I know I walked down a pretty steep hill toward the lake right from the train station, but that’s about all I know. I’d love to see your shots from the same area — I’ll send you an email so you can get ahold of me.
Dietas dos Pontos
September 11, 2008Wow! Looks great man! Its almost like making a HDR photo! I have to get a camera that shoots in RAW mode!
Sarah Bolopski
February 6, 2009I agree, I’ve never seen photographs so great looking on raw mode. Thanks for sharing.
Vasilis
February 9, 2009Thanks for posting this. I just discovered Epic Edits Weblog last week and it’s already one of my favorite blogs.
Pretty good article. I love the examples shown.